


Tripmeter
coming soon
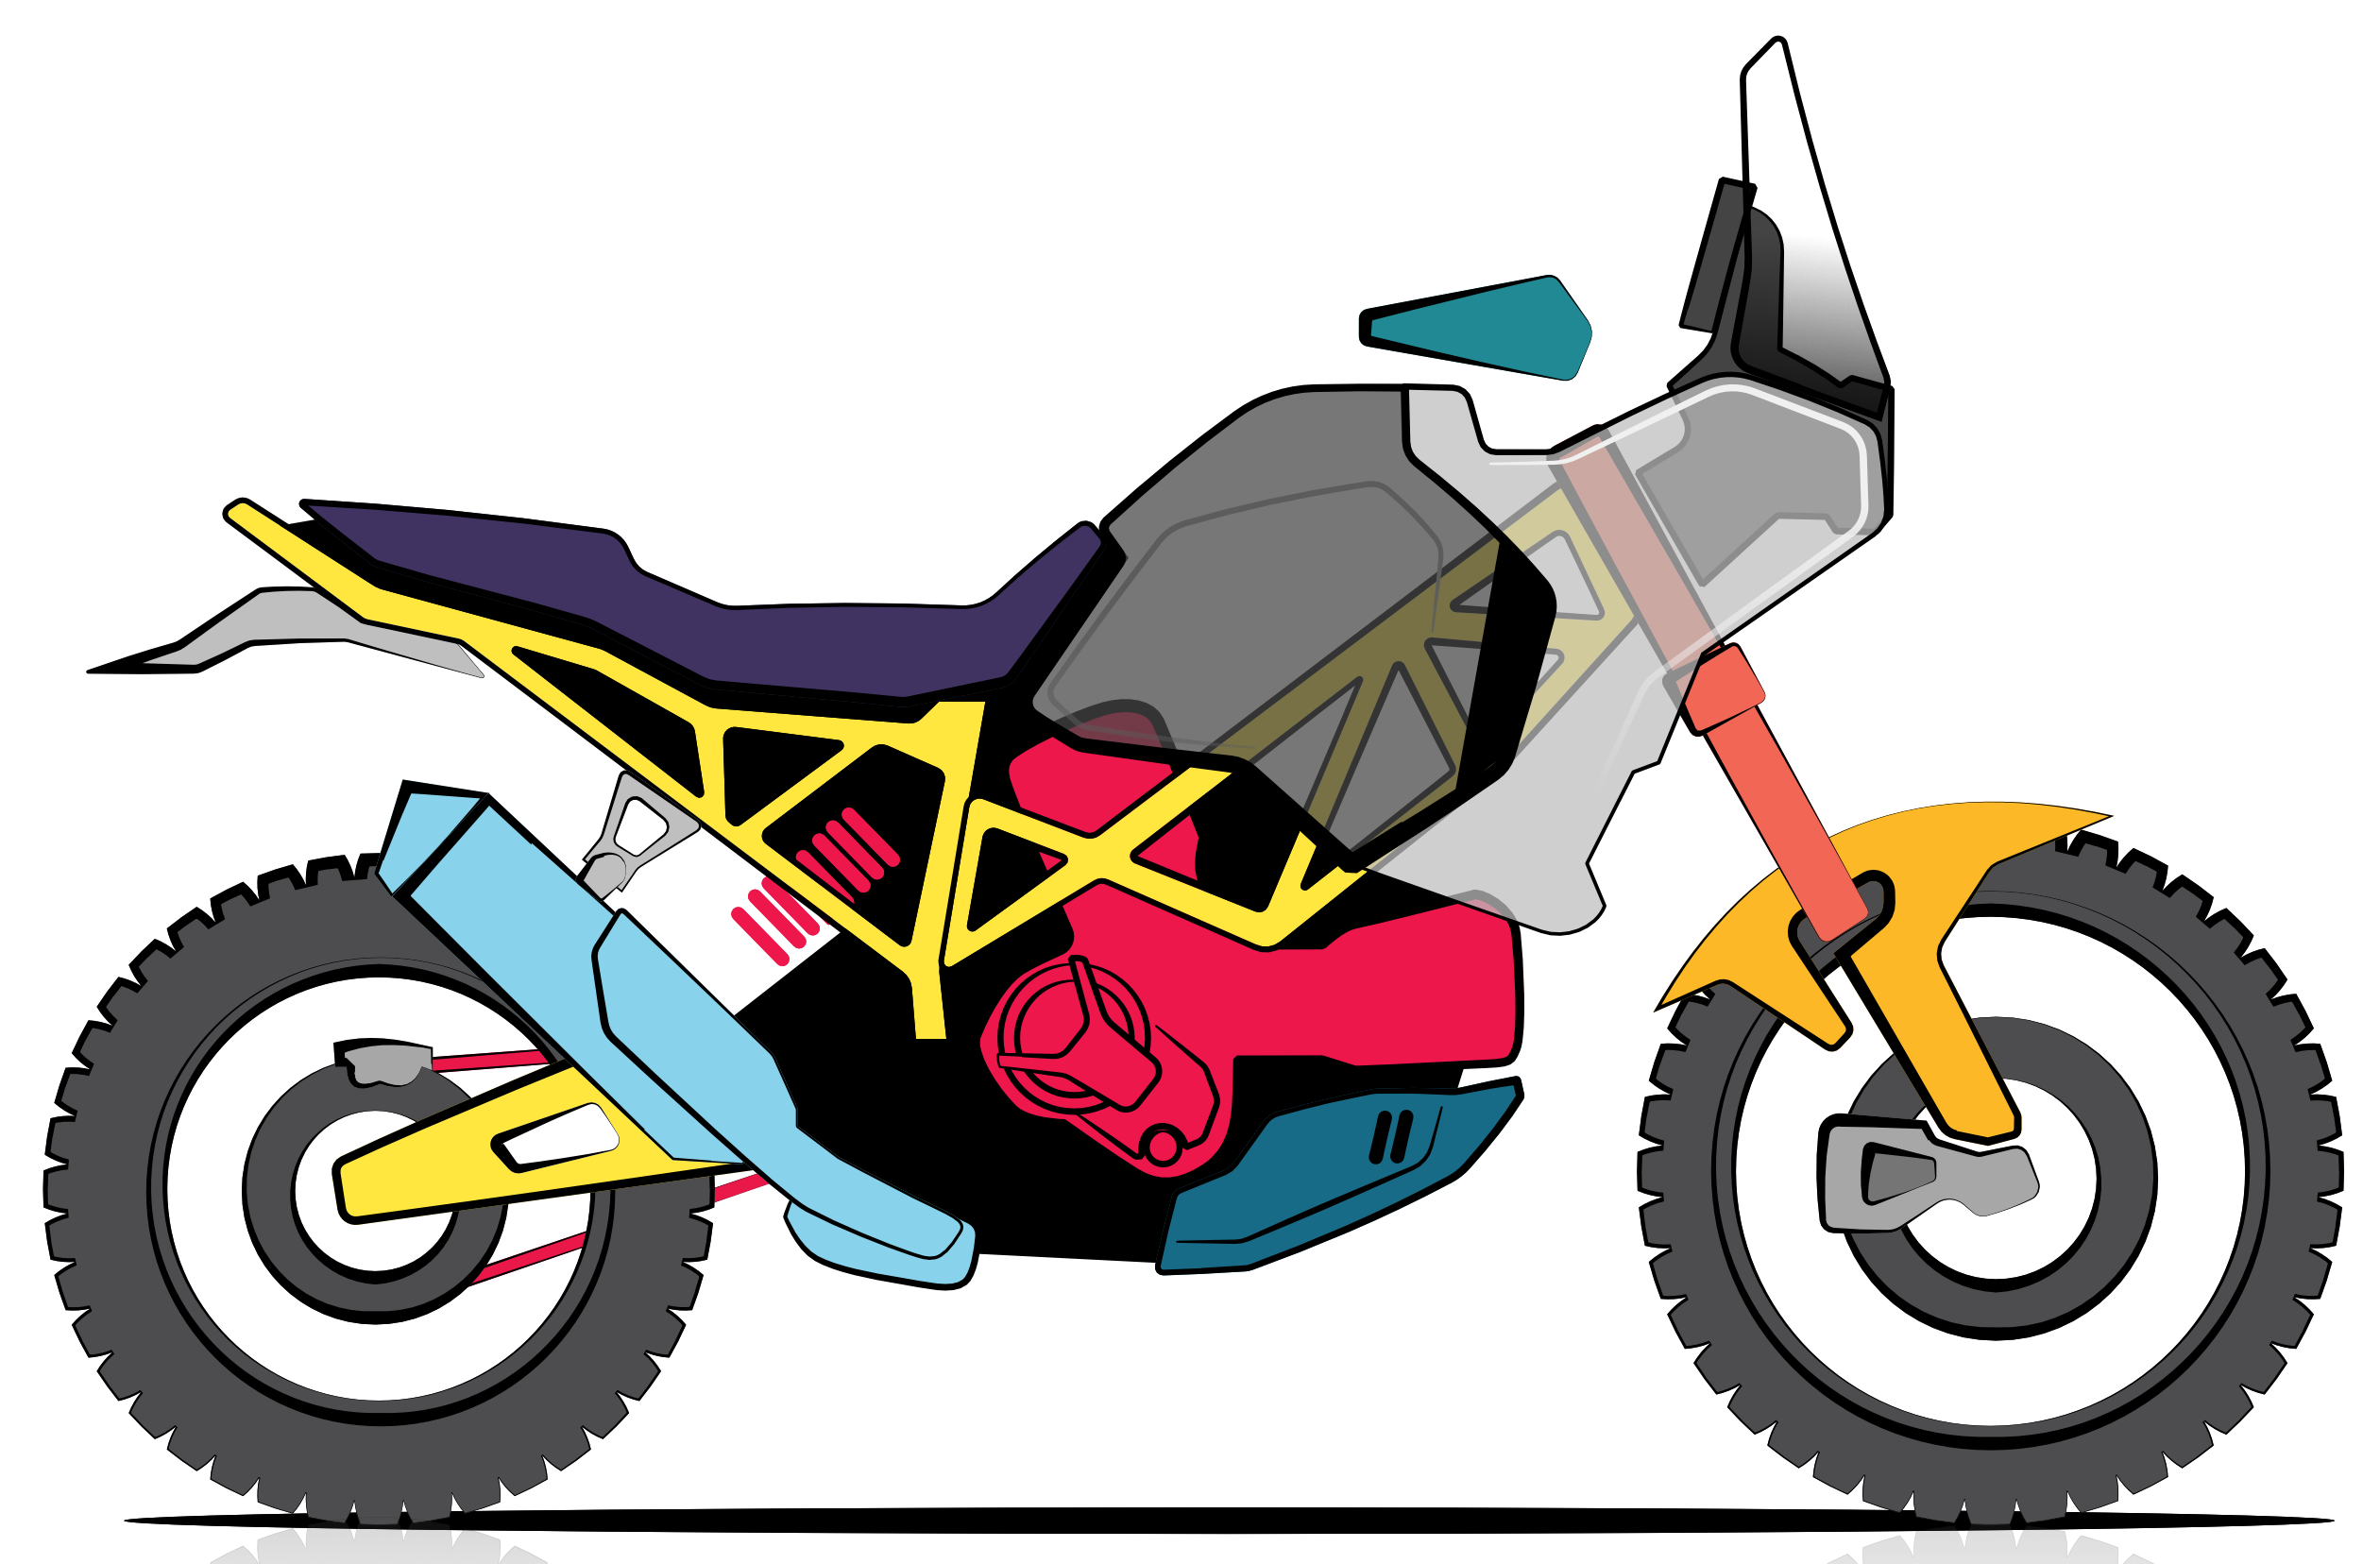
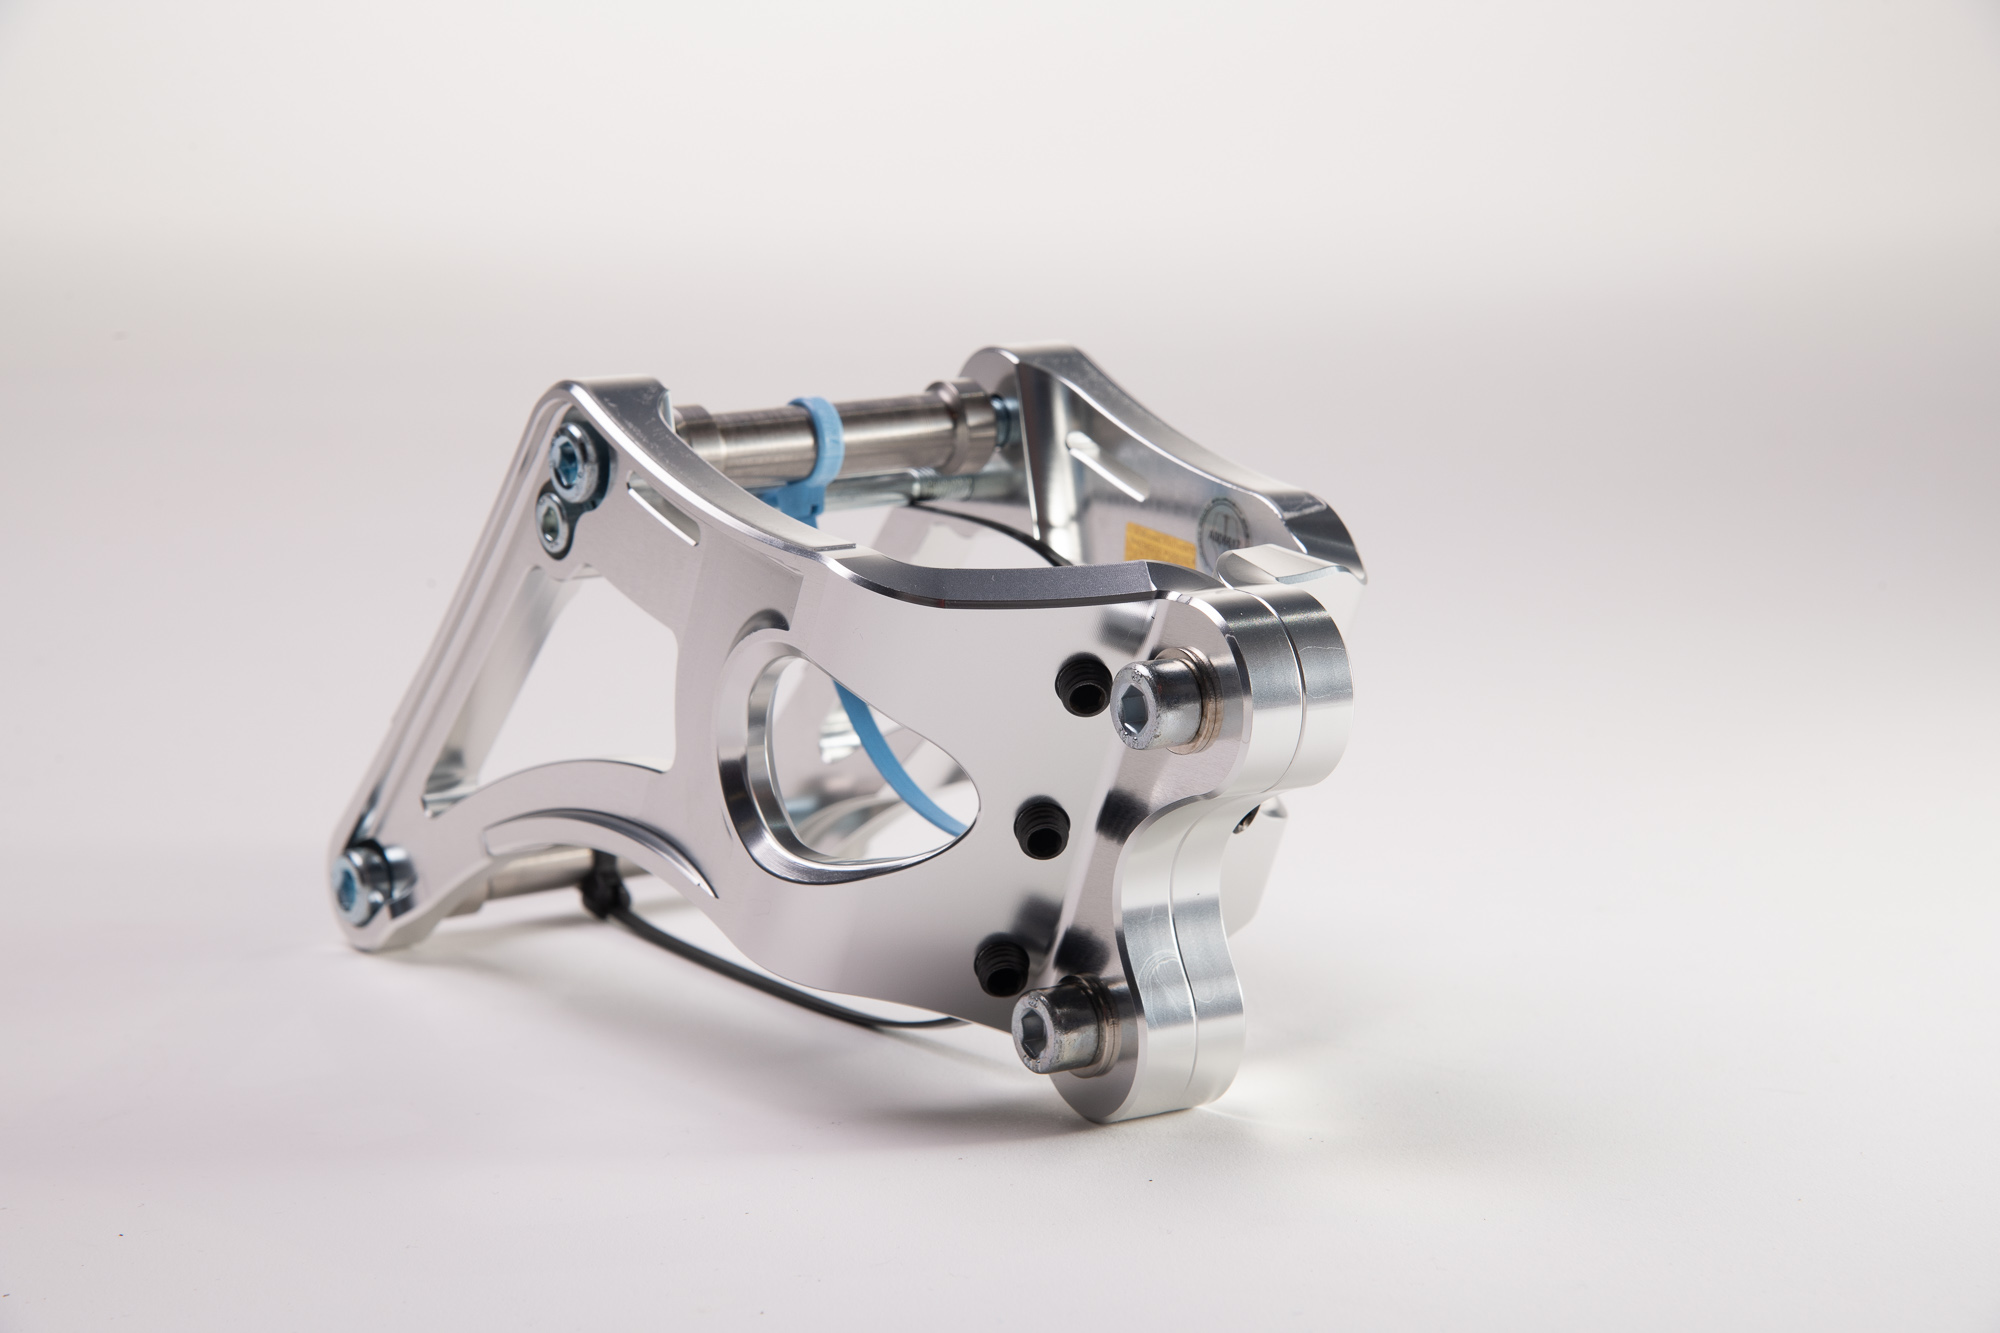
Navigation Towers: A Comprehensive Guide
The Navigation Tower is one of the most important parts of a rally bike. The general characteristics of a navigation tower will affect the way each bike behave during off-road riding. For example, a heavy, front weight biased tower will create a ‘pendulum’ effect. This will result in the rider getting tired quicker, but also upset the bike characteristics. It is important therefore to look at the following properties for the towers.
1. Materials Matter:
Modern navigation towers are crafted from a diverse array of materials, including Aluminum, Steel, Polymers, and Composites. Each material choice possesses its distinct advantages and drawbacks, deserving careful consideration:
Aluminum:
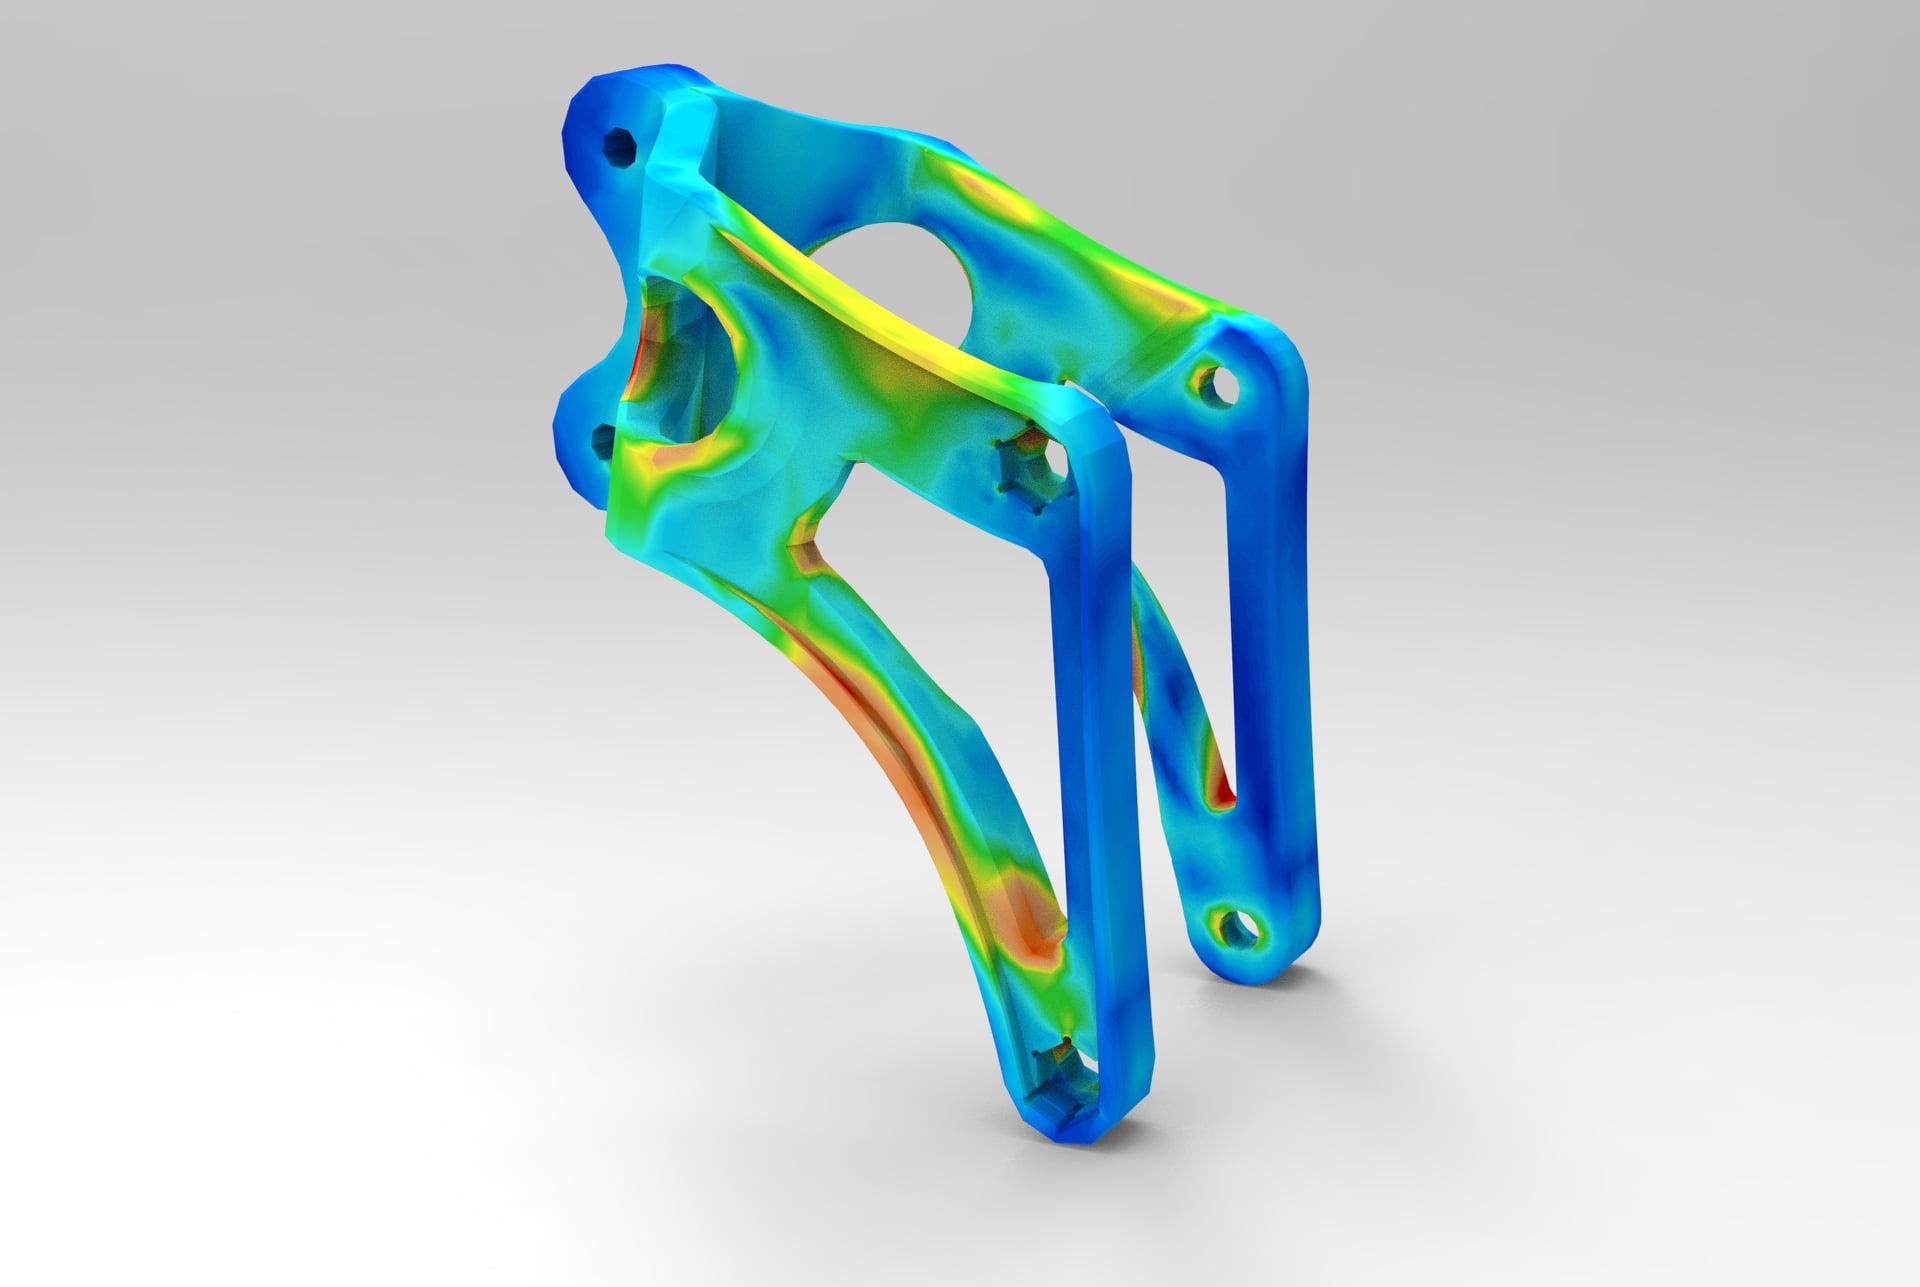
- Choice between CNC or Laser Cut: CNC surpasses laser cutting when appropriately designed.
- Consideration of Crumple Zones for crash protection.
- Weight balance and Center of Gravity (CoG) are vital considerations.
Steel:
- Known for better fatigue resistance compared to Aluminum.
- Ensures durability and long lifespan when properly designed.
- Heavier than Aluminum.
Polymers:
- Lightweight and resistant to aging or fatigue if material choice is optimal.
- Best suited for components requiring deflection during crashes.
Composites:
- A recent entrant, demanding specialized manufacturing equipment.
- Carbon composites require unique design considerations.
- Prone to catastrophic failure and electrical conductivity.
2. Crash-Proof Design:
Accidents are an inevitable facet of motorcycle racing. Towers equipped with crumple zones can significantly enhance instrument survival during crashes. Given that the tower houses all electrical components, it is imperative that no damage occurs during falls. Our innovative approach, combining materials and geometries, prioritizes impact absorption to ensure a safe return to the bivouac or to a place that the rider can make repairs.
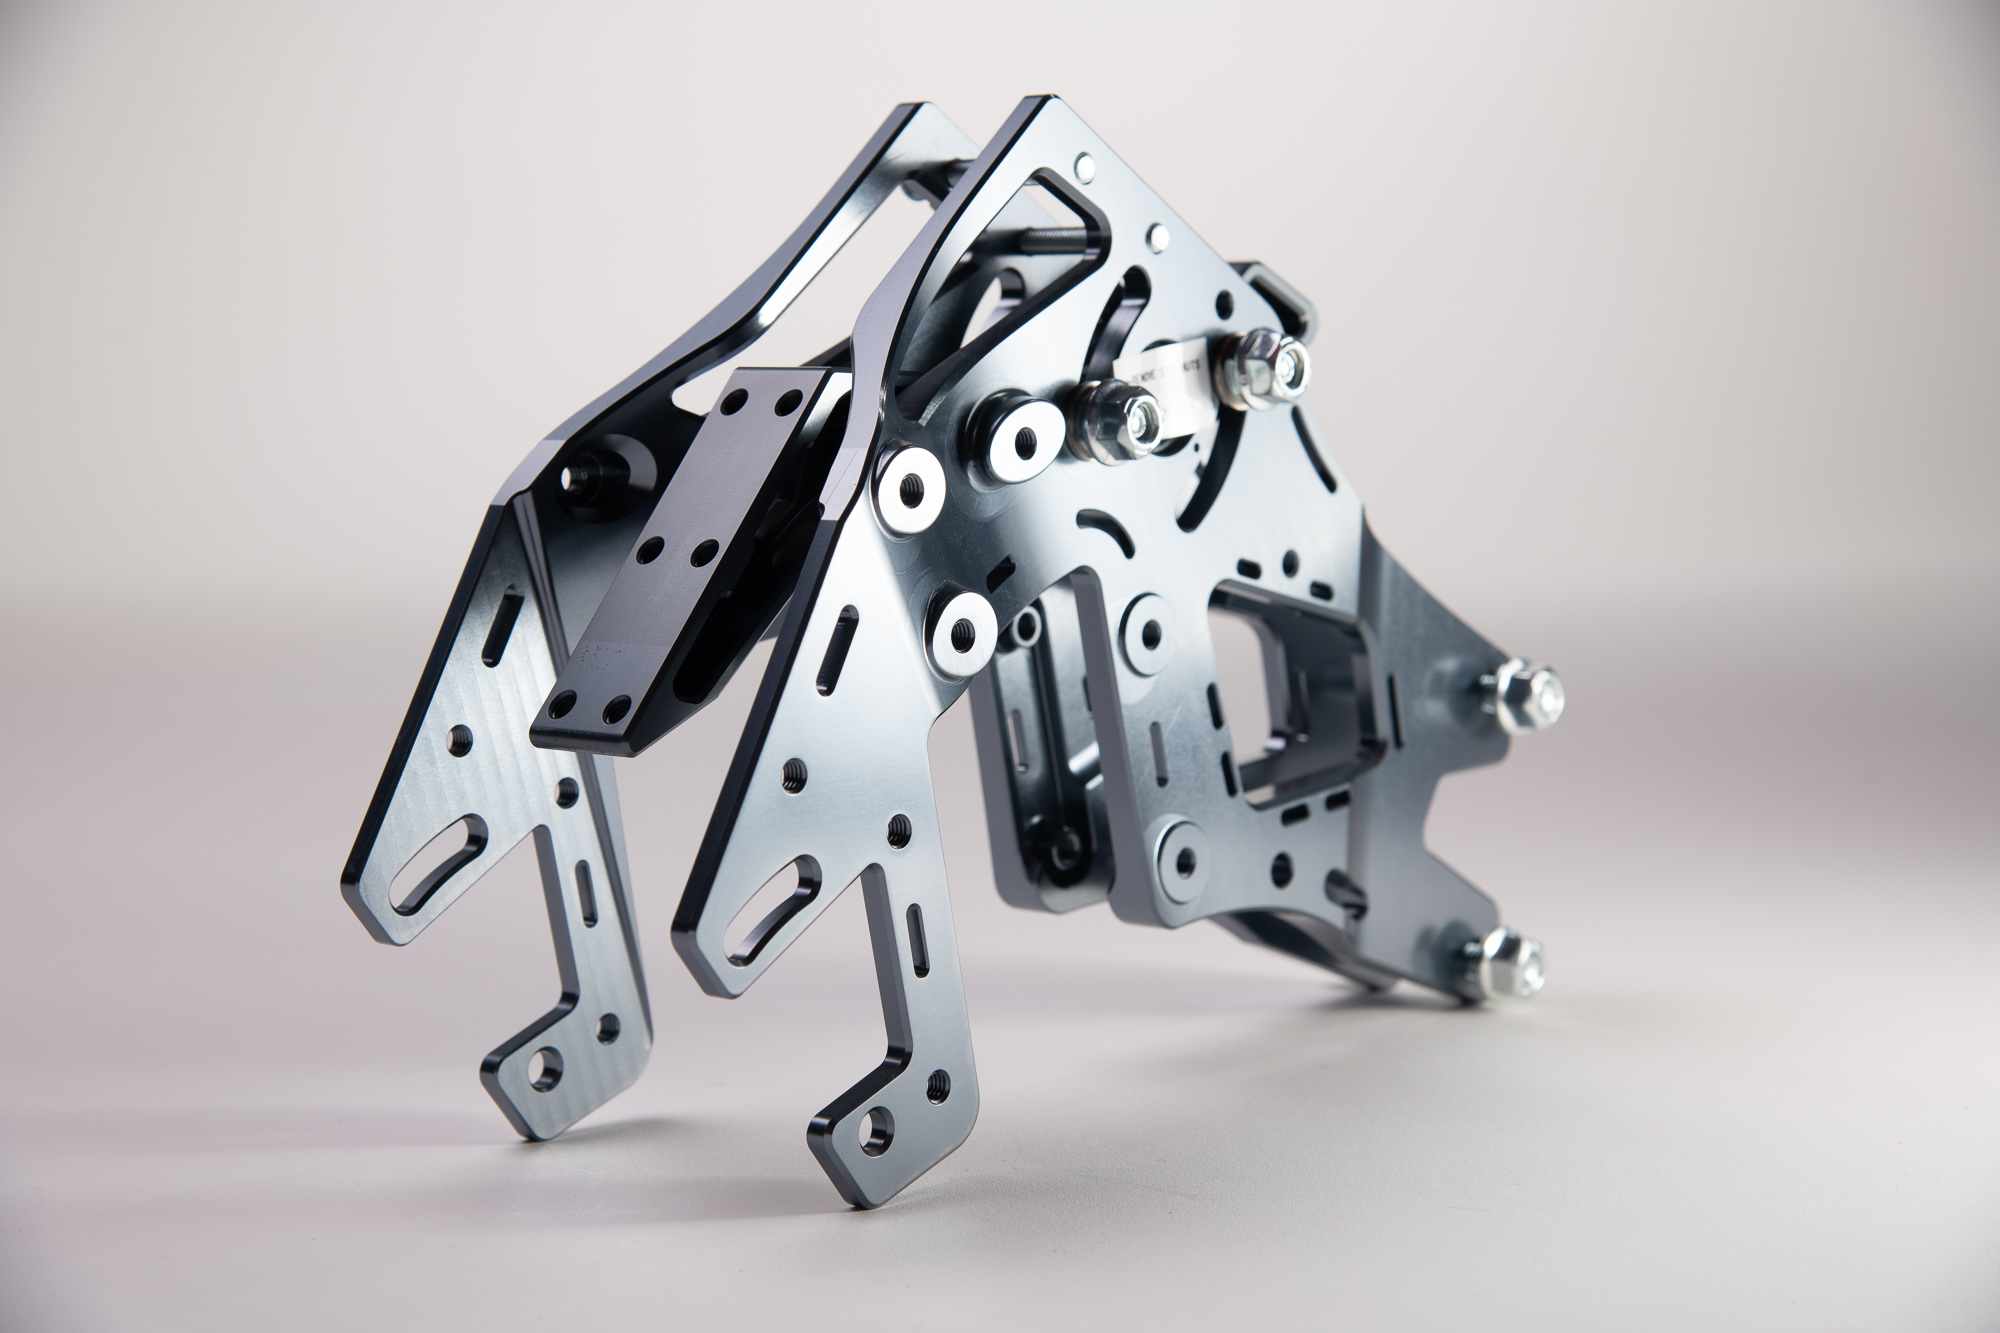
3. Weight Considerations:
Weight, undoubtedly important, depends on the intended use. Carbon Fiber excels in professional racing setups with ample spare parts. For versatility, metals like Aluminum offer flexibility through CNC machining, enabling precise thickness variation. Our CNC towers exemplify this approach, boasting aluminum navigation towers weighing less than 1kg. Our innovative mono-block design is set to decrease the tower weight even further.
4. Spacers and Fasteners:
The assembly of navigation towers necessitates unique configurations. To avoid potential challenges during disassembly or maintenance, we employ innovative inserts that resist rotation. High-quality galvanized 10.9 grade bolts, complemented by all metal locking nuts, ensure reliability and longevity. Our commitment to continuous improvement includes monitoring parts' behavior through client feedback, promptly addressing any issues that may arise.
In sum, understanding the intricate nuances of navigation towers empowers off-road enthusiasts to make informed choices, enhancing both the safety and performance of their rally bikes. Our dedication to precision engineering and quality assurance underscores our commitment to delivering navigation towers that exceed expectations.
Diving a bit deeper, into the material properties:
1. Aluminum:
Variety of Grades: Aluminum offers a wide range of grades, each with distinct characteristics. These grades can vary in terms of hardness, heat treatment, and intended applications. For instance, you might encounter softer or harder grades, heat-treated varieties, or even those designed for naval or aerospace applications.
Manufacturing Methods: Aluminum navigation towers can be produced using two primary methods: laser cutting and bending or machining from a solid block of material (CNC machining). CNC machining, when designed properly, often outperforms laser-cut counterparts.
Crumple Zones: Both CNC-machined and laser-cut aluminum towers can incorporate crumple zones. These zones are engineered to collapse during a crash, absorbing impact energy and protecting valuable equipment.
Center of Gravity (CoG): Achieving the right CoG is critical with aluminum towers, as it directly affects the bike's stability and handling. Proper design considerations are crucial to ensure the desired balance.
2. Steel:
Superior Fatigue Resistance: Steel, known for its robustness, boasts superior fatigue resistance compared to aluminum. It can endure repeated stress cycles, making it a favorable choice for durability.
Welding and Paint: Steel is weldable and can be easily painted, offering versatility in terms of design and customization.
Infinite Life: When appropriately designed, steel components can have an infinite lifespan, meaning they can withstand prolonged stress without failure.
Heavier: Steel is denser than aluminum, resulting in a heavier tower. This weight difference should be factored into the overall bike's performance considerations.
3. Polymers:
Lightweight and Resilient: Polymers, a relatively new entrant in the navigation tower arena, are prized for their lightness and resistance to aging or fatigue when the right material is chosen.
Vibration Concerns: Due to their lower density, polymer towers may exhibit vibration. Therefore, they are best suited for components that need to deflect or absorb impact energy during a crash.
4. Composites:
Recent Introduction: Composites, particularly carbon fiber, have gained traction but require specialized manufacturing equipment for consistent quality and performance.
Design Complexity: Carbon composites demand a fundamentally different design approach compared to metallic structures. They are also challenging to repair in the field.
Catastrophic Failure Risk: Carbon composites are prone to catastrophic failure, which means they can suddenly break apart. This risk must be carefully managed in design and usage. Composites tend to exhibit brittle behavior, delamination, they are sensitive to impacts and there is a lack of visible warning signs. This can make it challenging to predict when a composite component will fail.
Electrical Conductivity: Carbon composites conduct electricity, necessitating sealing of cabling to prevent any hazards.
In summary, the choice of material for a navigation tower is a critical decision that impacts not only the tower's weight but also its durability, vibration characteristics, and overall performance. Different materials come with their own set of advantages and disadvantages, and the selection should align with the intended use, design objectives, and rider preferences.
.jpg)
The screen, or windshield as it is called is a major safety part on the bike. It is the first layer of protection that each rider has. It protects the navigation gear and the rider from stones, rain, and mud, while it also protects the rider from wind. Depending on its size and shape it can create am enjoyable ride, or hell.
Screen material and manufacturing method is of utmost importance. Polymers such as Nylon and Polycarbonate are the best, especially if they are used in injection moulding. This results in a controlled thickness, uniform properties and a screen that is virtually indestructible.
And why you need that? Imagine a screen that is made from acrylic (known to the public as PMMA, Plexiglas, Perspex, and other names). These materials not only are brittle, but when they break, they will leave sharp edges. The screen will remain in front of your throat/forehead for the rest of the journey and in a small crest they can hit your forehead or throat creating life threatening situations. It is like riding and having a knife point at you where the screen is. Would you dare to ride off road with that?! Aurora's way is to innovate. To make something that did not exist. Read on to see how the Screen Safety System came to life in 2022!
In the street bikes, those materials may not be dangerous, after all a crash which will break the screen on a street bike, usually means that the bike needs to be taken away by other means. Nylon and Polycarbonate have excellent properties, and they suit off road riding. But why don’t we see them around? Because the injection moulds are very expensive, and they need to be super polished to achieve the clarity that a bike screen needs. Look out for the material, because not only it means that these screens are safer, but you will not need a lot of spares too! In Aurora we firmly believe that safety is a paramount. The rider must be kept safe at all costs. Sometimes that cost may be the screen or the nav gear, but better to lose equipment than injure a rider.
Having that in mind, Aurora in 2022 pioneered the first Screen Safety System (S3) in the rally world. A patent pending system that allows the screen to move out of the way in case it comes into contact with the rider. Added bonus is the screen adjustment in infinite steps. The system is comprised of a special unit (S3) with four pads that change he friction in a polymer plate, while the screen brackets are polished stainless steel (AISI316) and Teflon stickers are used to minimize friction. Sounds complex? It's not! The system will try and protect the rider and the screen will even detach from the tower to make sure that the rider is not injured. The rider can also choose through different modes of safety himself. Stay tuned as we are working full time to create something really unique, which in combination with S3 we believe it will revolutionize the industry!
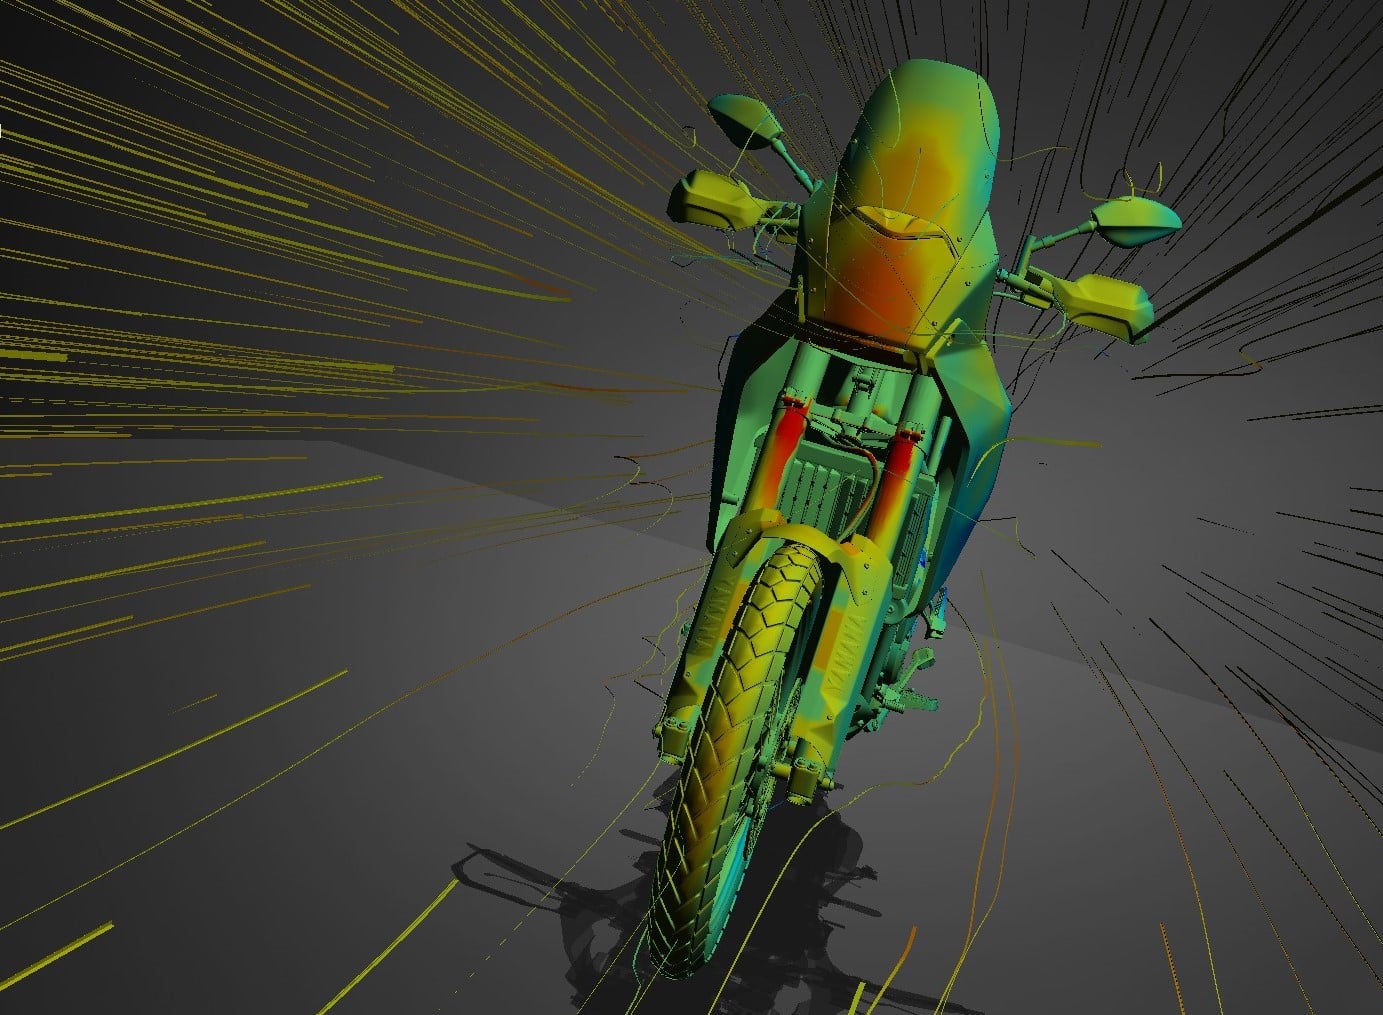
Screen geometry is also important. A screen can create turbulence to a point that the bike is not possible to be ridden anymore. It is not an easy task to make a screen aerodynamic, quiet with a full protection of the upper body of the rider. The reason is that the system is chaotic. You have so many parameters (size of the rider, jacket, helmet, wind direction, screen shape, bike shape, rider clothes etc.) that is is almost impossible to make sure that one screen will fit all the riders. That is why screens come in sizes too! We firmly believe that Computational Fluid Dynamics can help us create something that will fit most riders and we use actively CFD in all the kits that we design. If you simply copy the position of a screen relative to the bars of the bike, this is not enough because the bike's triangle (seat > bars > pegs) is different.
Choose wisely!
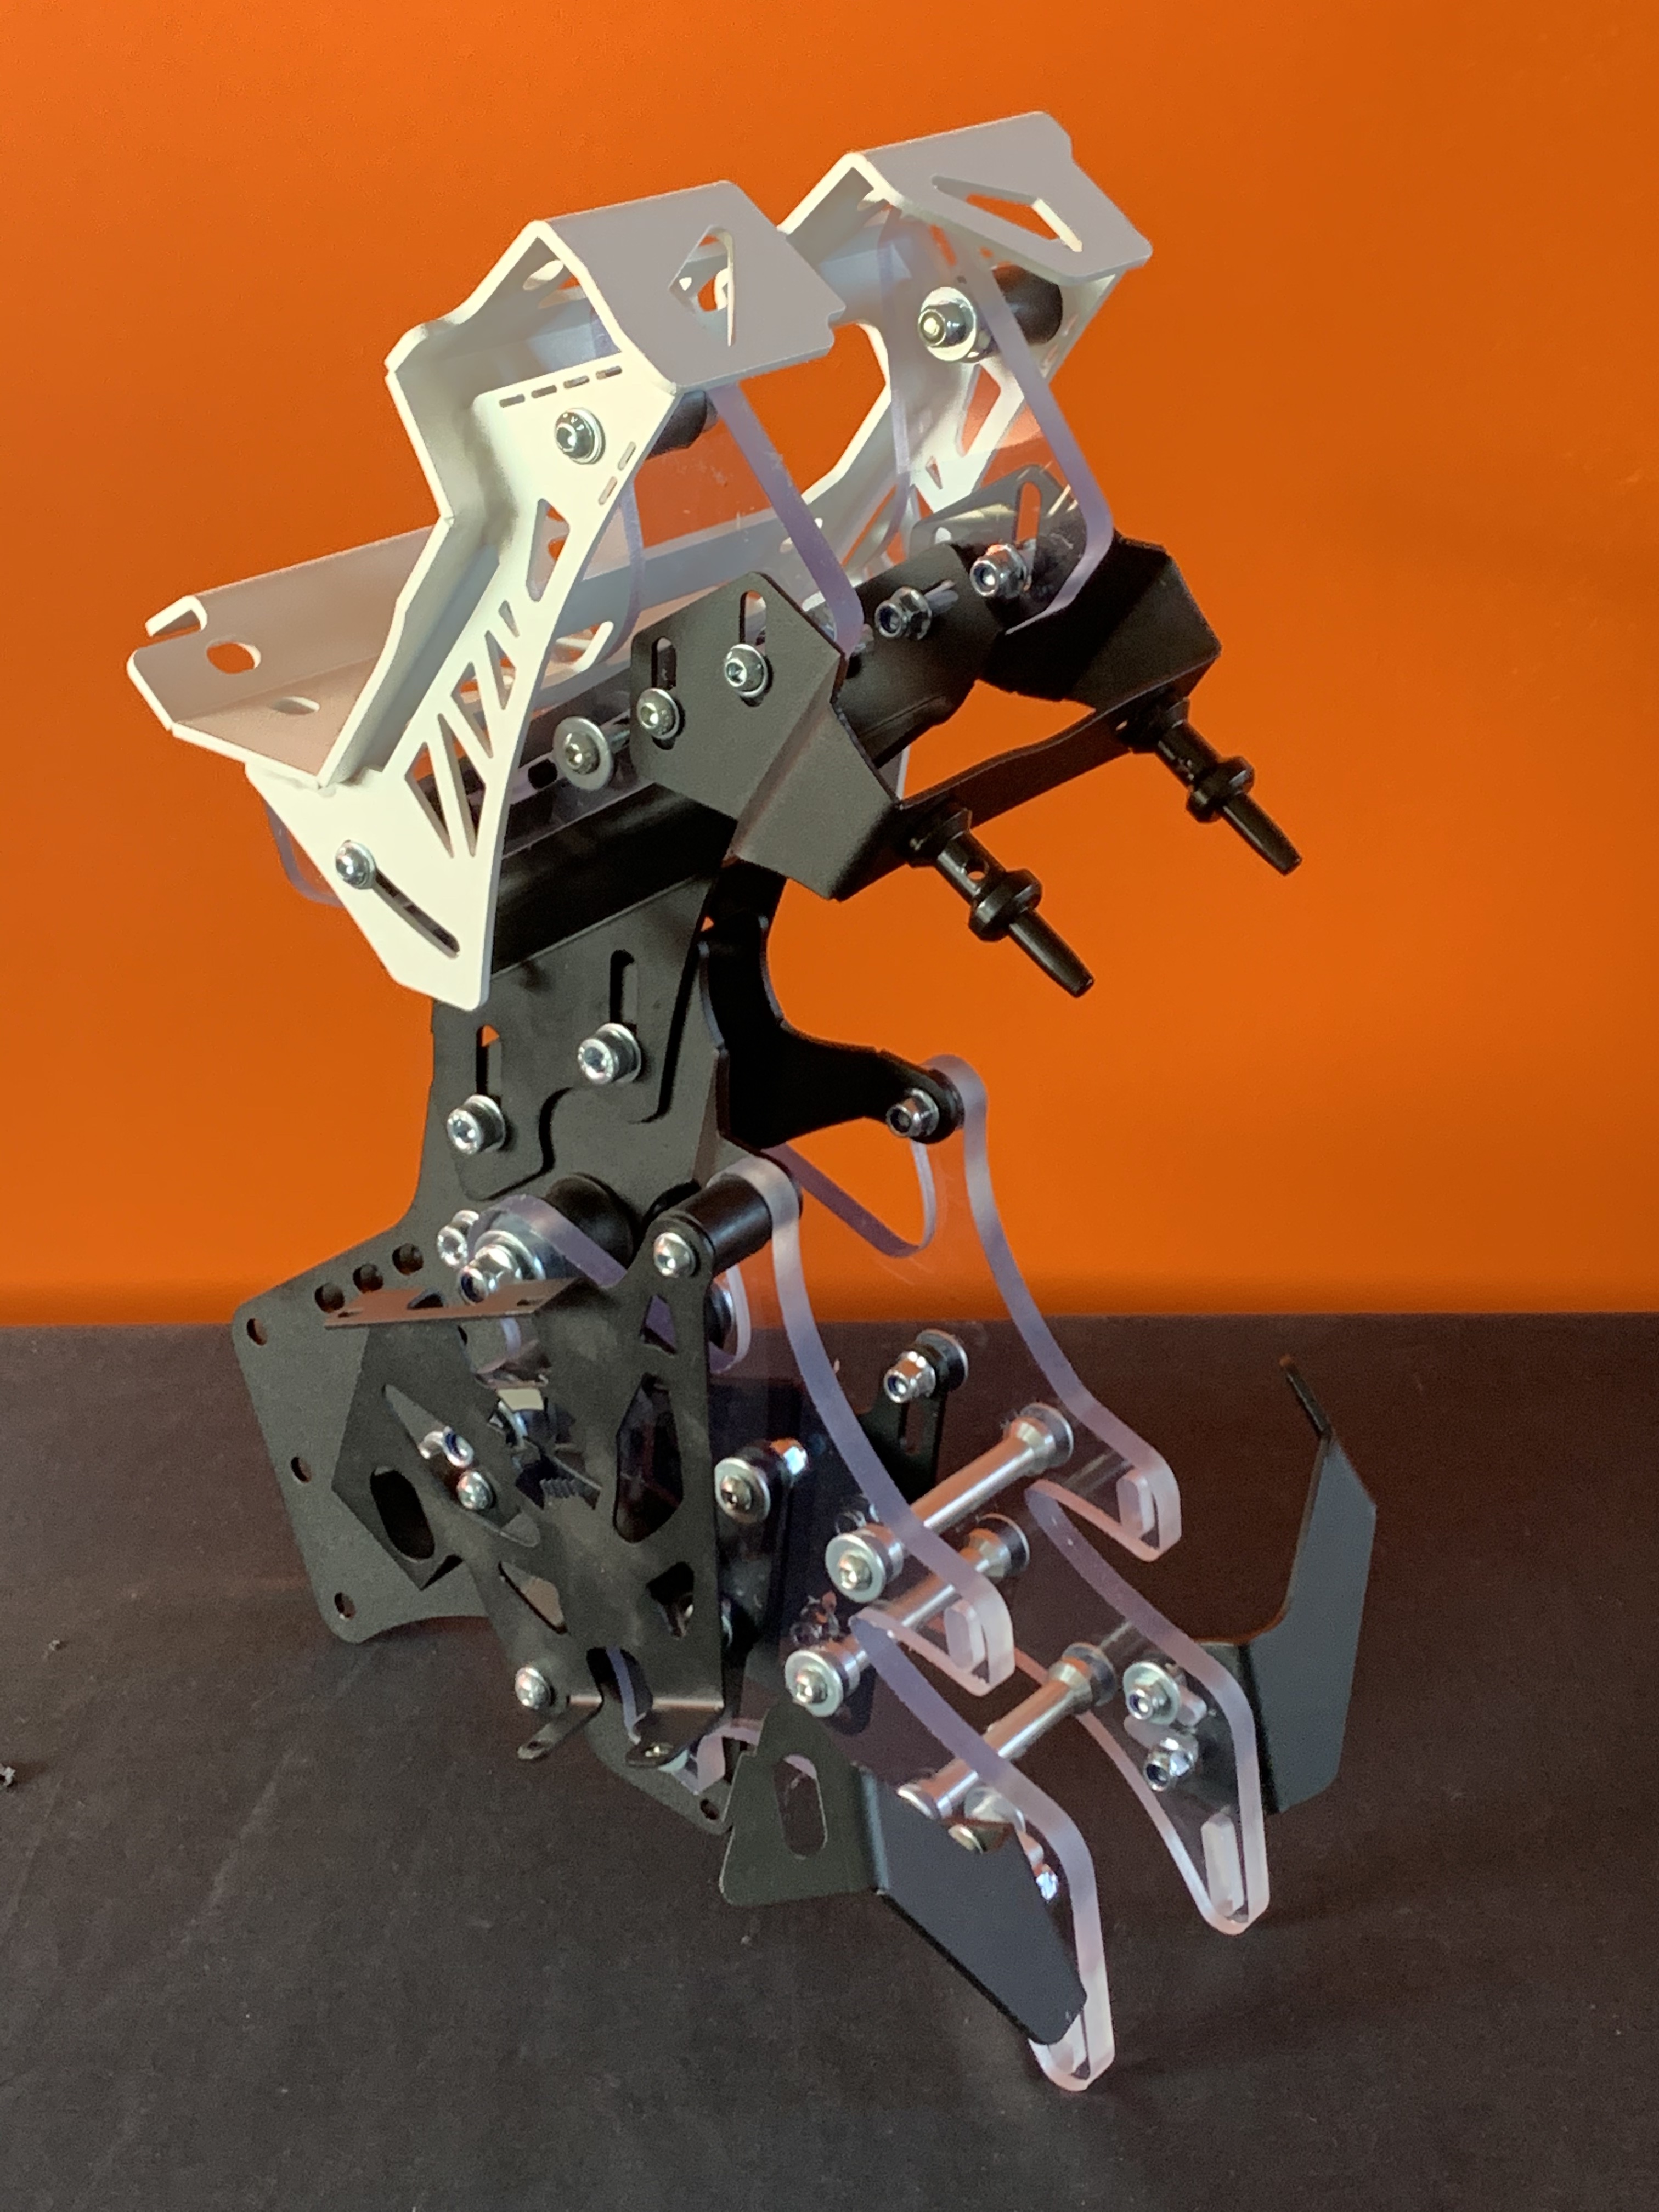
This is the most important part of every aftermarket or self-made kit. Make this right and the tower will stay in its place. Make it wrong and all hell breaks loose.
There are different methods to attach a navigation tower onto the bike. Drilling, welding, clamping. All valid, up to a point. Depending on what your skills are, and how invasive you want to be on your personal bike, you can weld a frame clamp, or drill some holes and bolt one. On all our full kits we have opted to give non invasive designs. Parts that can be attached to the frame of the bike without the need of permanent modification. Fully reversible plug and play parts so to speak.
Welding.
Welding is one of the most reliable methods if done right. Usually it is not, so it ends up being an unreliable setup. The frame of the bike is also permanently modified, something that in some countries is fully illegal. It will also invalidate the warranty of your bike 100%. In some cases, riders choose that solution, so let’s get some interesting, engineering points across. Whenever welding occurs, there is an area called ‘heat affected zone’. This is an area, which has not melted, but the metal changed its structure as it was exposed to high temperatures. We will not go into the steel structure details, (you can look up ‘Martensite’ on the internet and how it is formed during welding), but it is results in a very hard and brittle solid solution of Carbon and Iron. There are special techniques to avoid that while the parts are being weld. Usually, all welds need to be post treated to achieve the best possible properties. Especially when we try to weld in cast aluminum. We would advise to avoid welding onto aluminum cast members in total. It is better to drill on them and clamp with mechanical means. There are many different casting methods (green sand castings, permanent mold castings and die casting to name a few) and the weldability of the alloys, depends on which method was used as well as to which alloy was chosen to produce the parts. To cut a long story short, better safe than sorry. There are cases where rear swingarms failed due to the welding and even frame clamps during Dakar.
Drilling.
Drilling is an old method of attaching something to the frame. Basically, the head stem of the bike is sandwiched with a frame clamp. It is a common misconception that the frame is weakened. It is not (if done right!), and it is now stronger than before, since it has two more plates attached to it. It is important to align it right, make sure the holes are the minimum required diameter for the bolts to pass through to minimize play and off you go. Of course, once these holes are drilled, there is no going back!
Clamping.
Our favorite! This is the most complex out of the other two, since it requires a lot of design hours, reverse engineering and a lot of analysis and testing. The reason is that the clamping system is different (depending on the bike), hence the geometry of each clamp is unique. The fixing points are also different, making each analysis from a previous design obsolete. The clamping systems must have some important features. These will increase your safety, and make sure that you can reach your destination, no matter what the journey throws at you. Fail Safe. Each clamp must have a fail-safe system on it. What if the nut gets loose? What if the customer overtightens the clamping systems and it gets damaged? Where are the forces directed during a crash? Is there enough clamping area? We take all this guess work, and we do the analysis for you. The geometry and the materials are paramount. When U-bolts are used, ask for the material specifications. Soft U-bolts can be dangerous, as their threads can be damaged, resulting in an assembly with the wrong clamping force. The tower will vibrate, and eventually something will give up. We at Aurora Rally Equipment, went as far as designing and producing our own U-bolt made from ChroMoly steel to ensure that it will stay on your bike for the life of the product. If done right, this method requires reverse engineering tools. CMM scanning arms and laser scanners are our favorite tools!
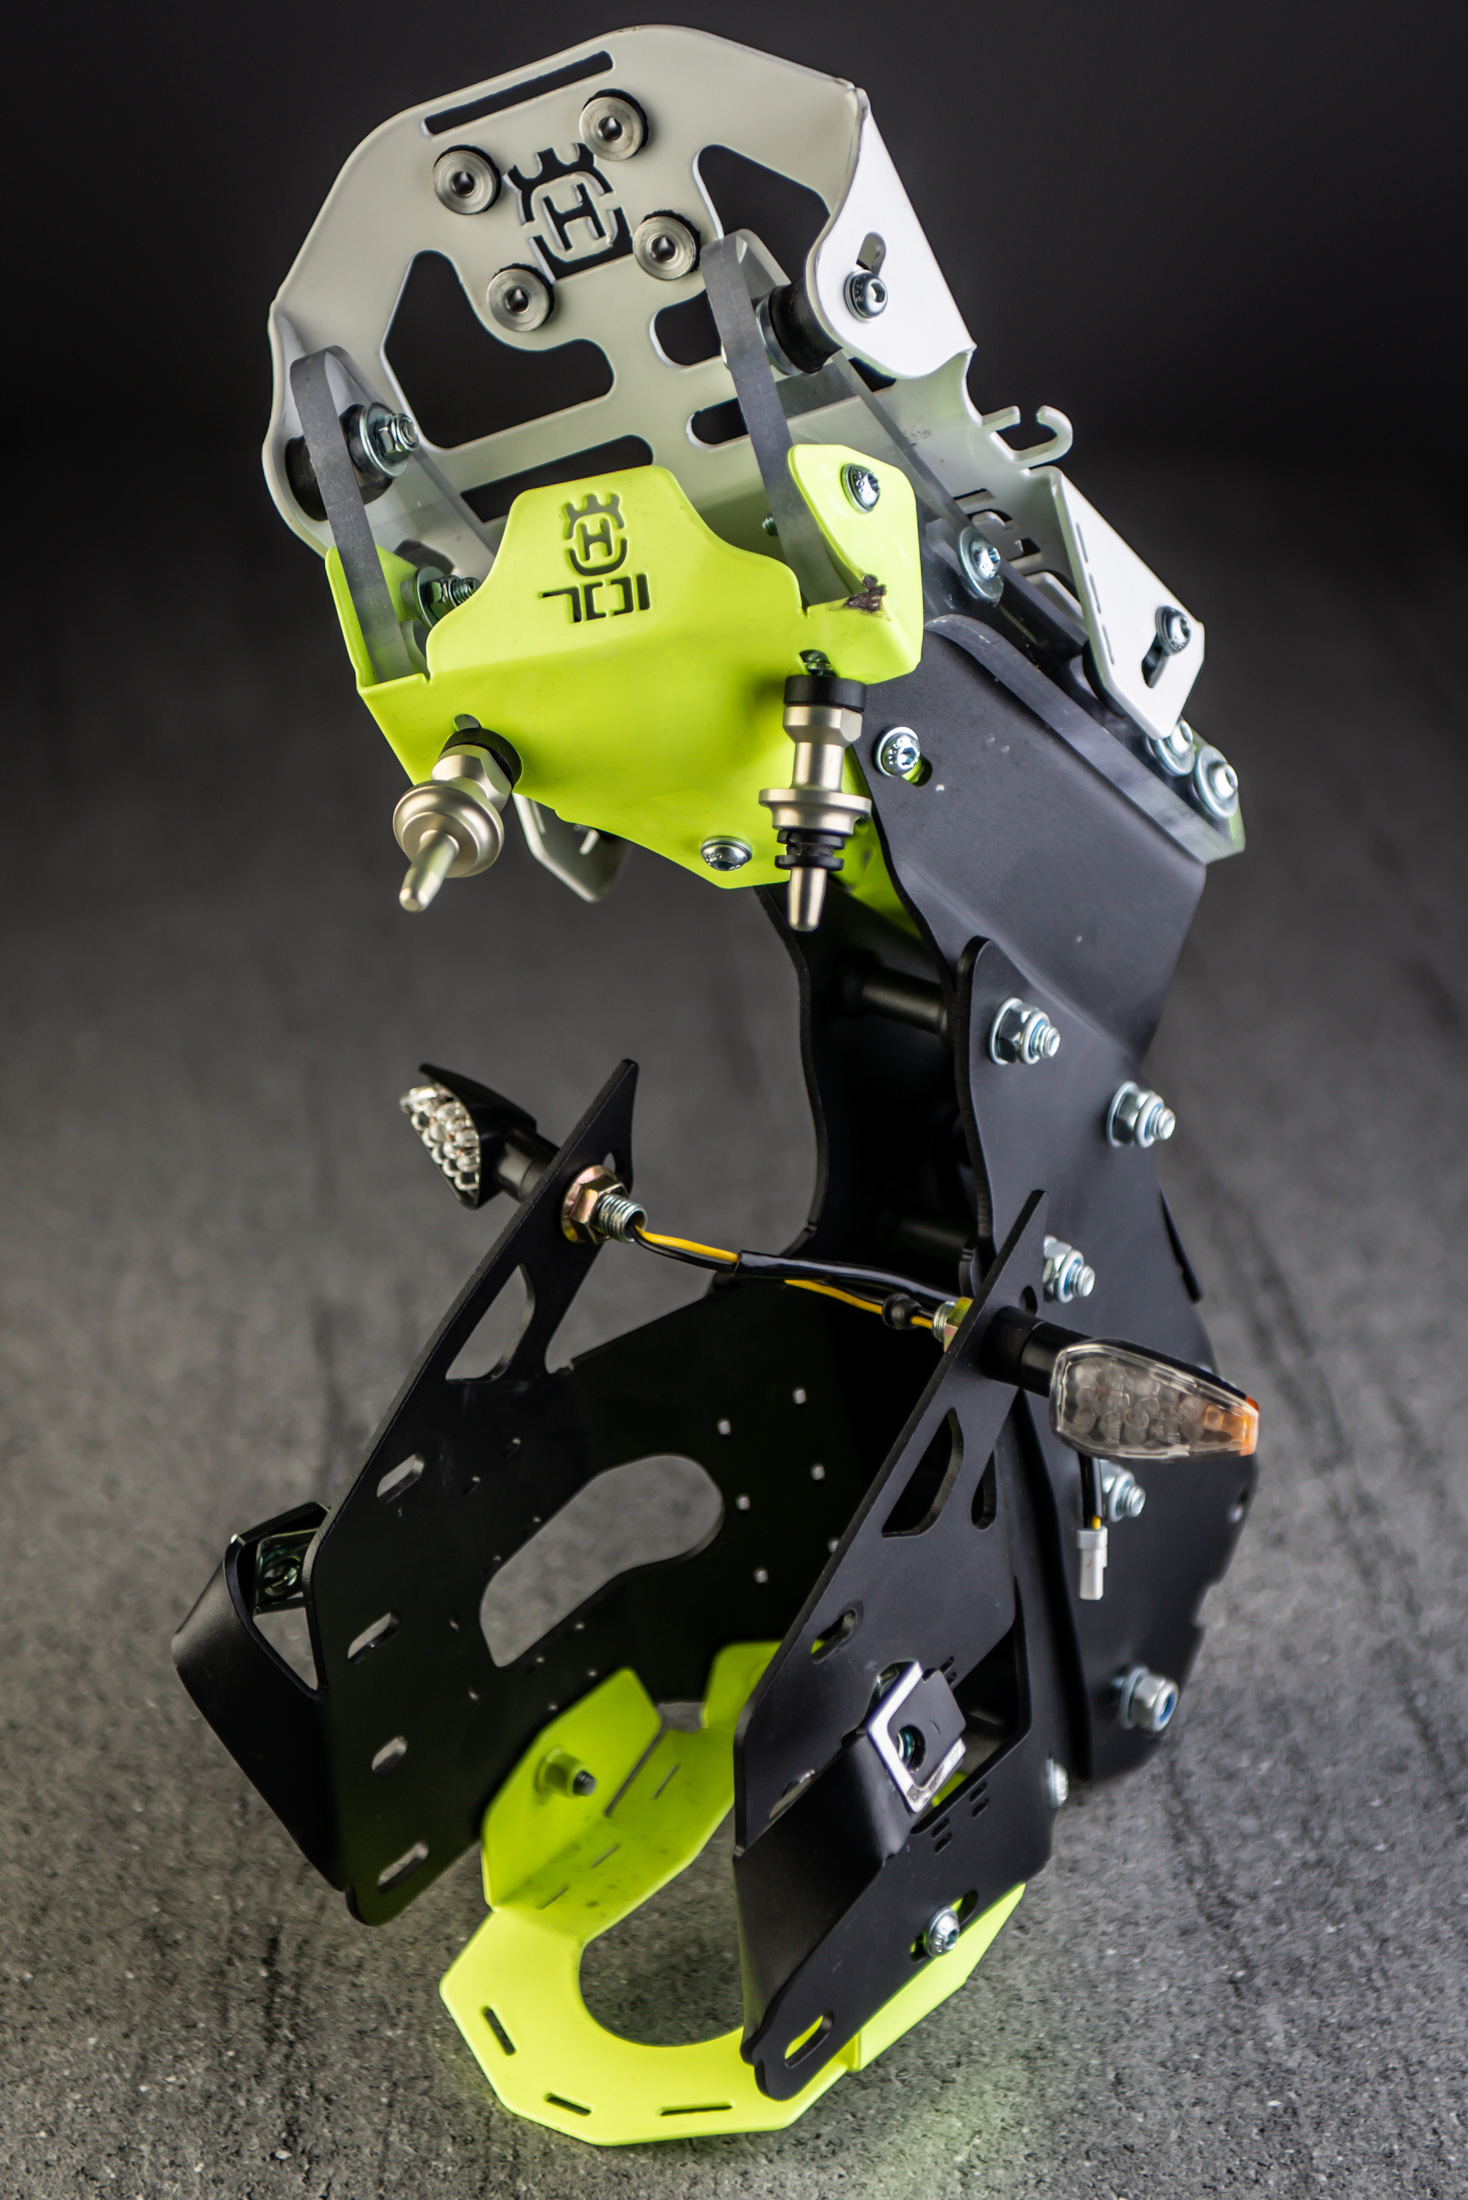
Clamps should be Reliable. You should not change clamps according to your riding style and you should not get a ‘special’ clamp if you are a racer. You should not tamper with the clamps in any way, as it is a safety part, but the design should be made to withstand the worst-case scenario. If there are two different clamps, one ‘racing’ and one ‘traveling’, ask ‘why?’. If you decide to race? Does it mean you need to swap? The clamp of your bike is the foundation of your navigation gear. It is where the tower is fixed, and it is where all the vibrations and forces from the tower will be directed. It should be designed to take it all. Crashes included. Imagine that the tower is damaged during a rally. (a) It is a major task to swap it and (b) a lot of things can go wrong during repairs. Add to that the clamp, if it gets damaged and you may be looking to add another 1hr in the bivouac, during your trip (if you had a spare…). The clamp should stay on the bike no matter what and it should protect the frame as well. To that end, look for warranties and design proof. We, at Aurora Rally Equipment, warranty for life all our frame clamps. For a good reason. And we are happy that both riders that crashed the 701 >>crashed towers and head clamps << and the 790 are still here with us to tell the tale, but also happy that all the research and development that has gone to these parts is proven during these crashes.
If we could put it in a phrase, the clamp should Never Give Up!
Electrics is the black art of rally and adventure. Most people cannot fight what they cannot see, and unless you can see electrons, you are on your own!
We did the homework and the hard job, so that you don’t have to. Each kit, light or navigation gear should come with its own electrical harness. Usually, motorbike manufacturers choose connectors which are not waterproof. Newer bikes have CANbus, and most connectors nowadays are fully waterproof for that very reason, but still some enduro bikes, especially for circuits that are not CAN controlled, have not waterproof connectors.
This can have a detrimental effect in the long run, especially if the cables and connectors are exposed or if the bike is in a wet environment and the connectors are not serviced at all.
The terminals of these connectors will slowly, but surely, corrode, and the equipment will start blowing fuses, not operating properly or even get damaged.
.png)
In Aurora we firmly believe in quality. We always use fully waterproof connectors on our systems to ensure that you will be safer in these long journeys, and we have pioneered the industry by getting the only fully, 100% waterproof fuse box in the rally scene. This is key to reliability and troubleshooting. While all the classic fuse boxes have an open rear end, our fuse box is designed much like a waterproof connector. Sealed terminals and fully sealed cover. You can go in a river and there will be no water in that fuse box. Is it important to go diving on a rally/adventure bike? Of course not. What is important is that the terminals are not affected by water/moisture/mud. Which happens if they are exposed. A fully sealed fuse box, means that if there is a short circuit is not coming from the corroded/damaged terminals, allowing you to troubleshoot easier and quicker.
Is it bad to expose the OEM connectors to the elements? If you service them right (clean them after you dip your bike in a river of mud, use contact cleaner etc.) you will not have any issues.
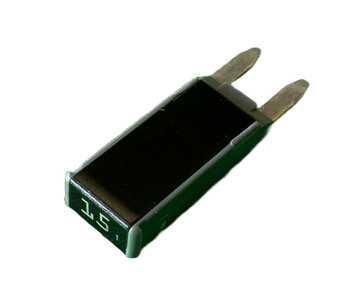
On the fuse area, Aurora first introduced in the rally arena the semi or fully automatic blade fuses. These fuses will automatically trip, and you can manually reset them, or they will automatically stay open until the problem is resolved. These fuses require different fuse boxes (and we have those too!), but allow you to stay safer by either carry only one spare or go with the normal fuses, and when the problem arises, you put the automatic fuse on to trouble shoot so that you don’t burn any more normal blade fuses. It is the only way to allow you not to run out of normal fuses during a trip to remote places!
Safer through technology.
Avoid harnesses that interfere with the bike’s CAN system to get power. Most of today’s bikes will have auxiliary harness to get power from with a proper fuse dedicated to that system. This is of utmost importance! Imagine you burn a fuse in the CAN system which may affect something else on your bike (ABS, ESP, even the lights can be affected so it will be a safety issue). Yes, it is a 5-minute job to put a new wiring harness on your battery with a dedicated fuse, but do it once and have a piece of mind.
Remember: If in doubt, ask!
.jpg)
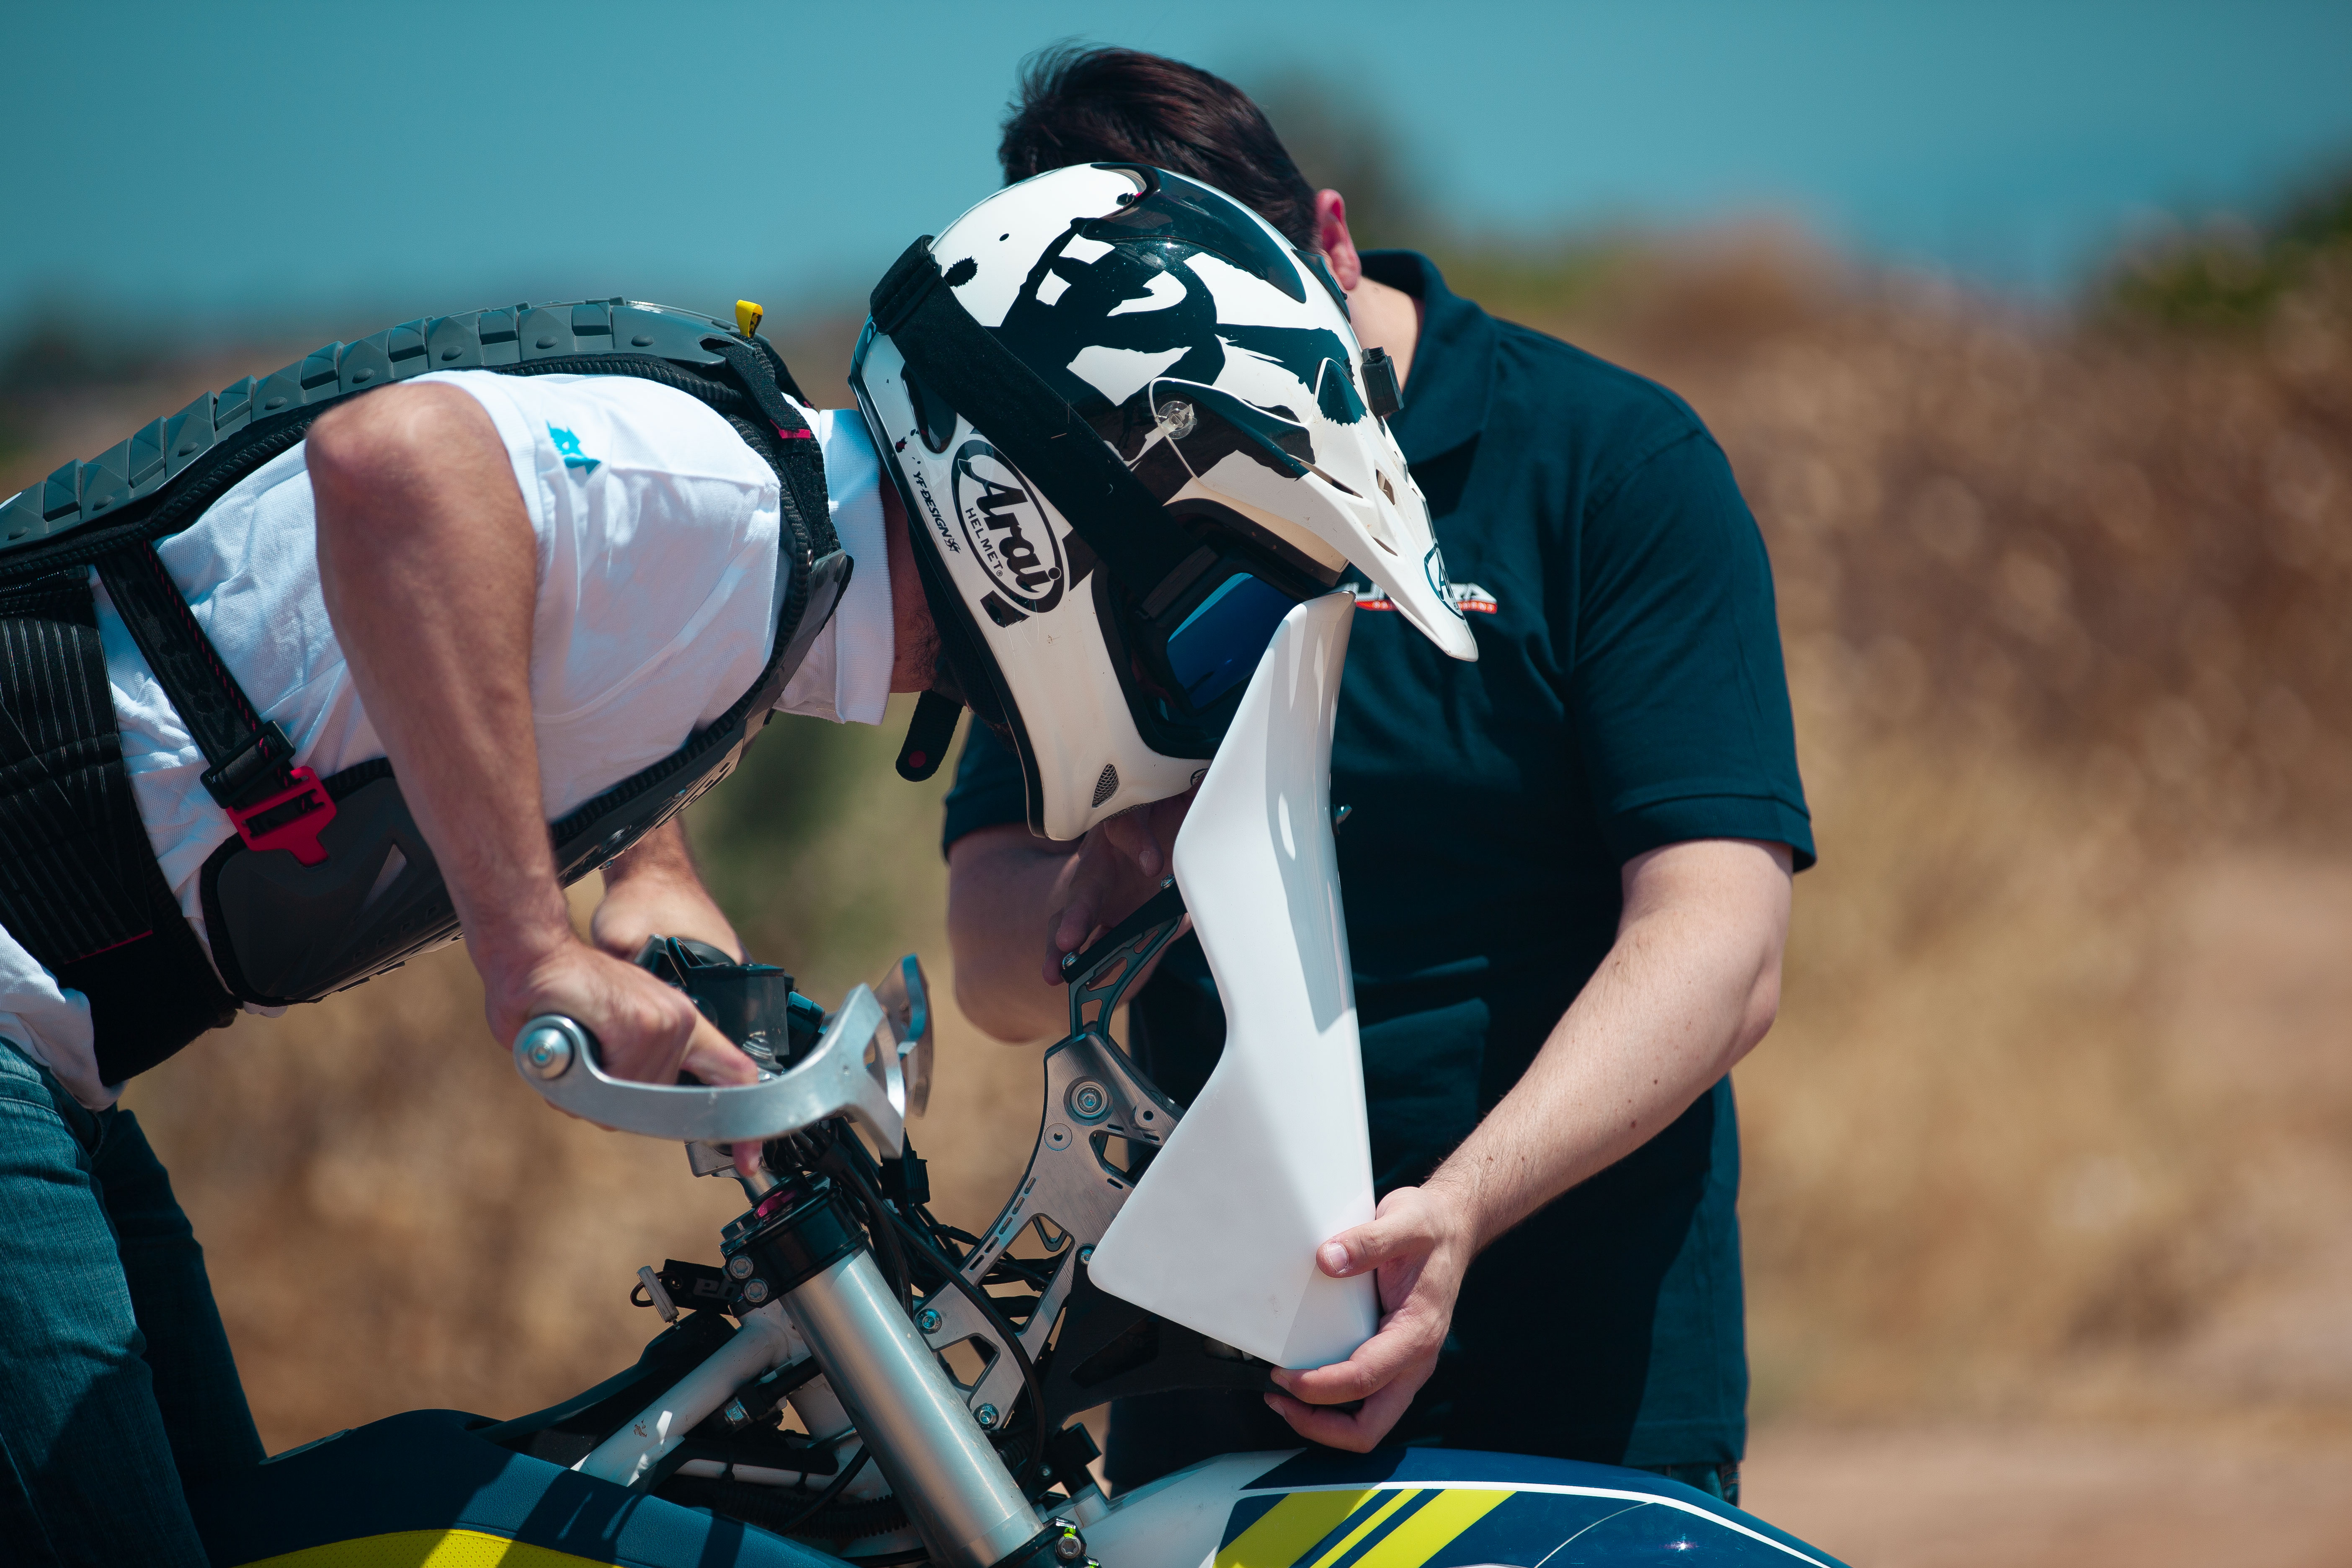
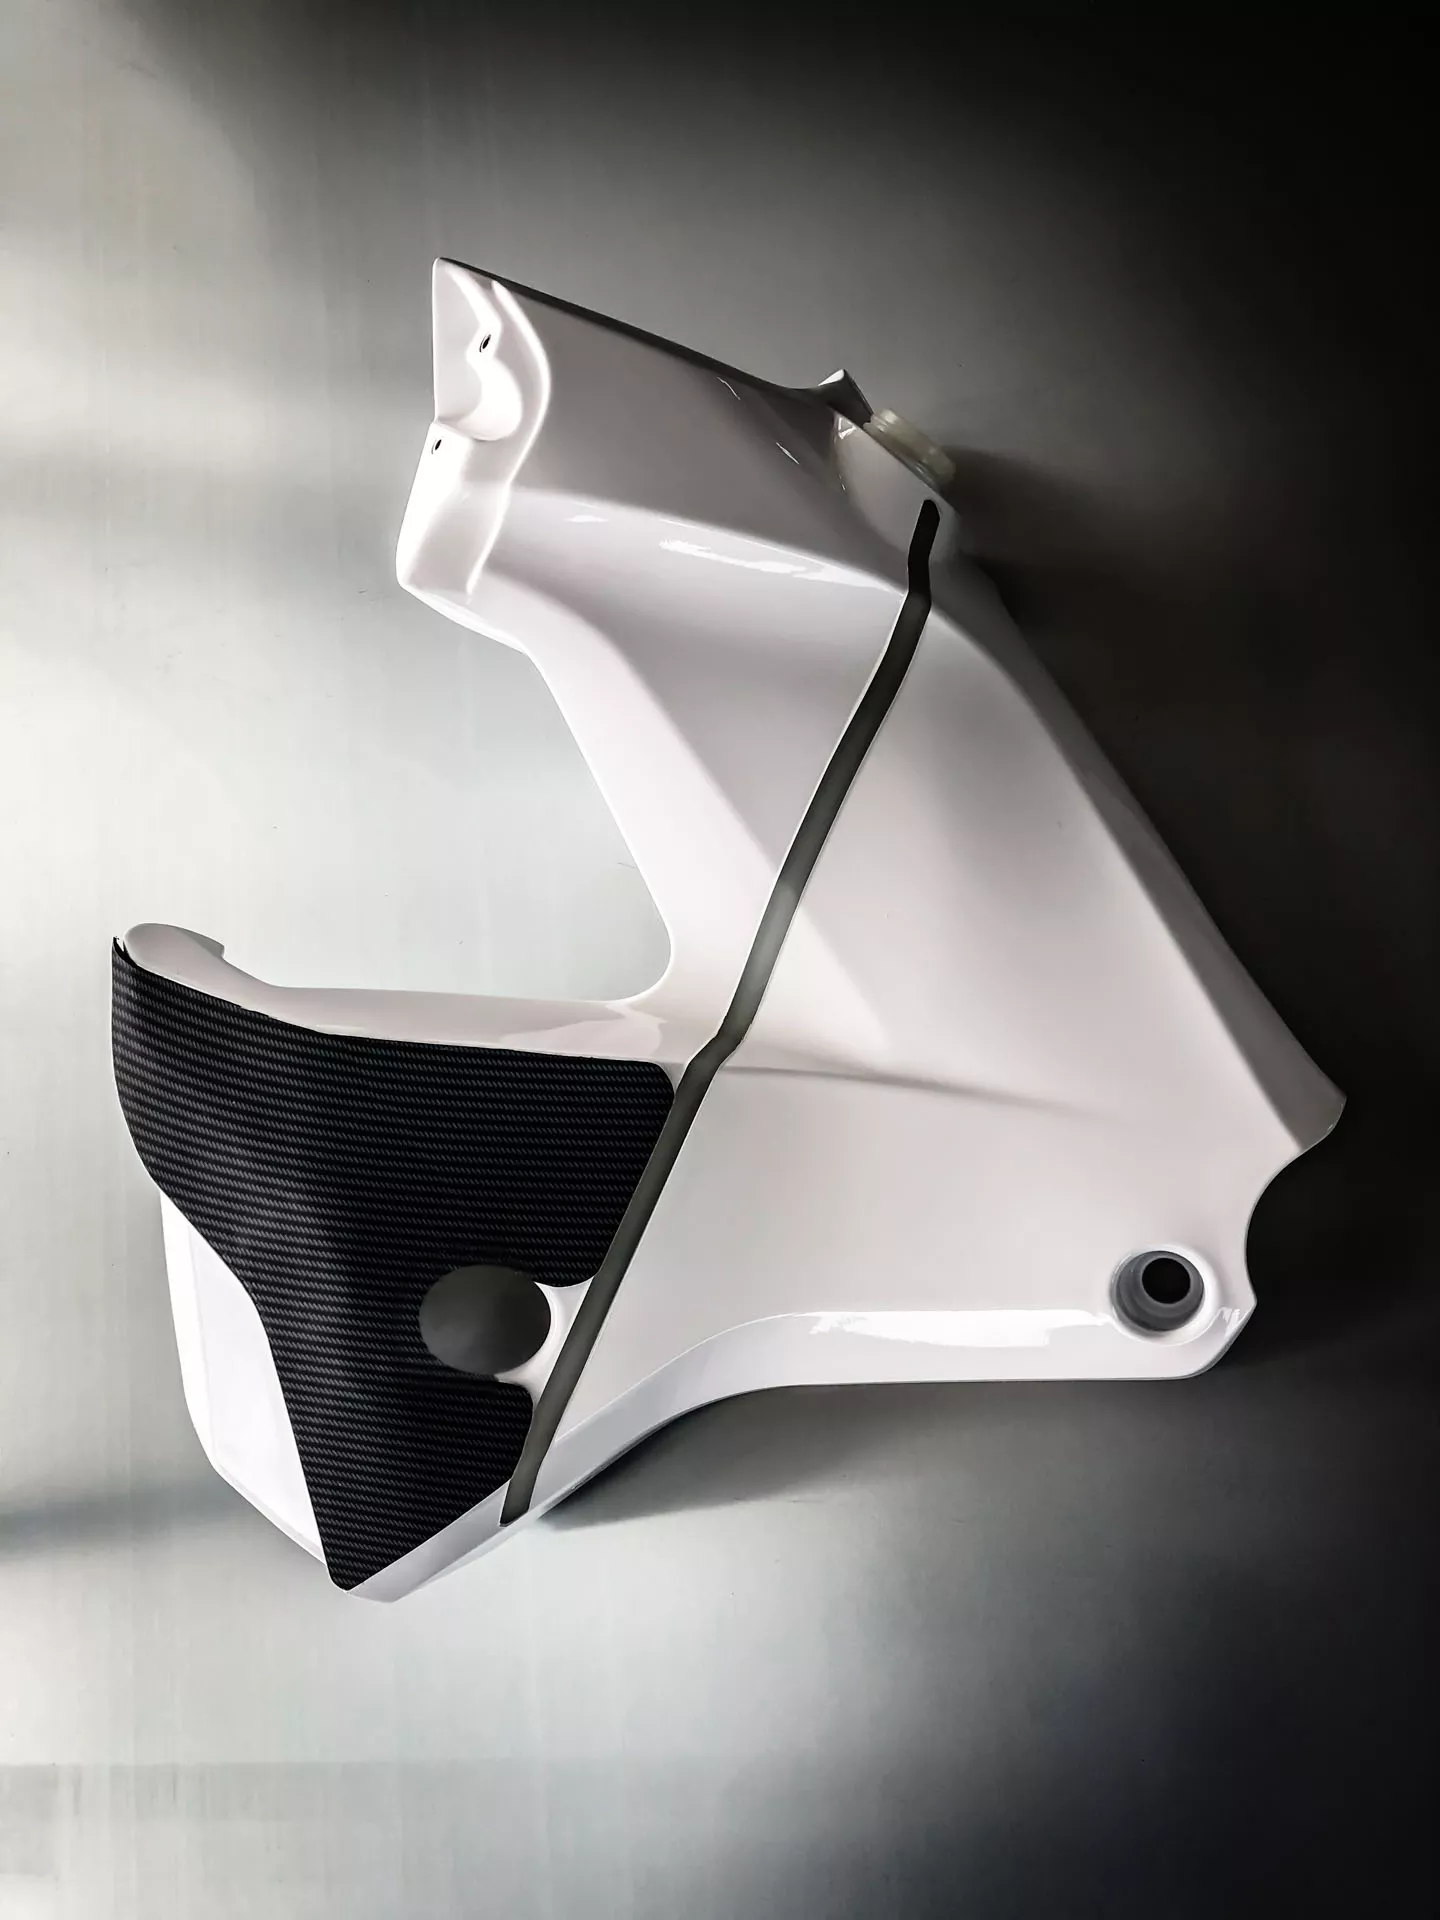
Rally kits will change the side fairings of the bike. Not only for looks, this is a common misconception, but to allow you to service your bike easier, quicker and safer.
A good adventure and rally bike needs to be designed in such a way that it will take you out of a difficult situation as quickly as possible.
Therefore, smart design will allow you to achieve that. If it looks awesome in that process, even better! All our kits minimize the time it takes to undress the front end of the bike. Take our 690 lite kit as an analogy.
Side panels can be configured to be removed from the bike without any tools. Our 701/690 Xplorers. You need only one Allen key to remove tanks and skid plate and to fully undress the front end of the bike (screen/side panels/left and right tank/skid plate/seat) you need less than five minutes.
The front of the bike can be removed without any tools in our Xplorers and in out lite kit versions of the 701 and 690 the riders remove only four and two bolts respectively.
It is not only through our racing history that we have learned to optimize that, but through the optimal design. Leaving the side panels of the bike on, and then adding a kit on top of them, means more parts to undo when the time comes. More fiddling, and more errors in the assembly process. We want none of that!
Let’s call that “Engine Protection” because there are two names for that. A “Skid Plate” and a “Bash Plate”.
Both have the same purpose. To protect the engine from stones, rocks, sliding over ruts, side falls etc. Skid plates are made from different materials. Carbon Fiber, Kevlar/CF, Aluminum, Stainless steel, and Polymers. Each to its own, but there are some great advantages and disadvantages on all the above.
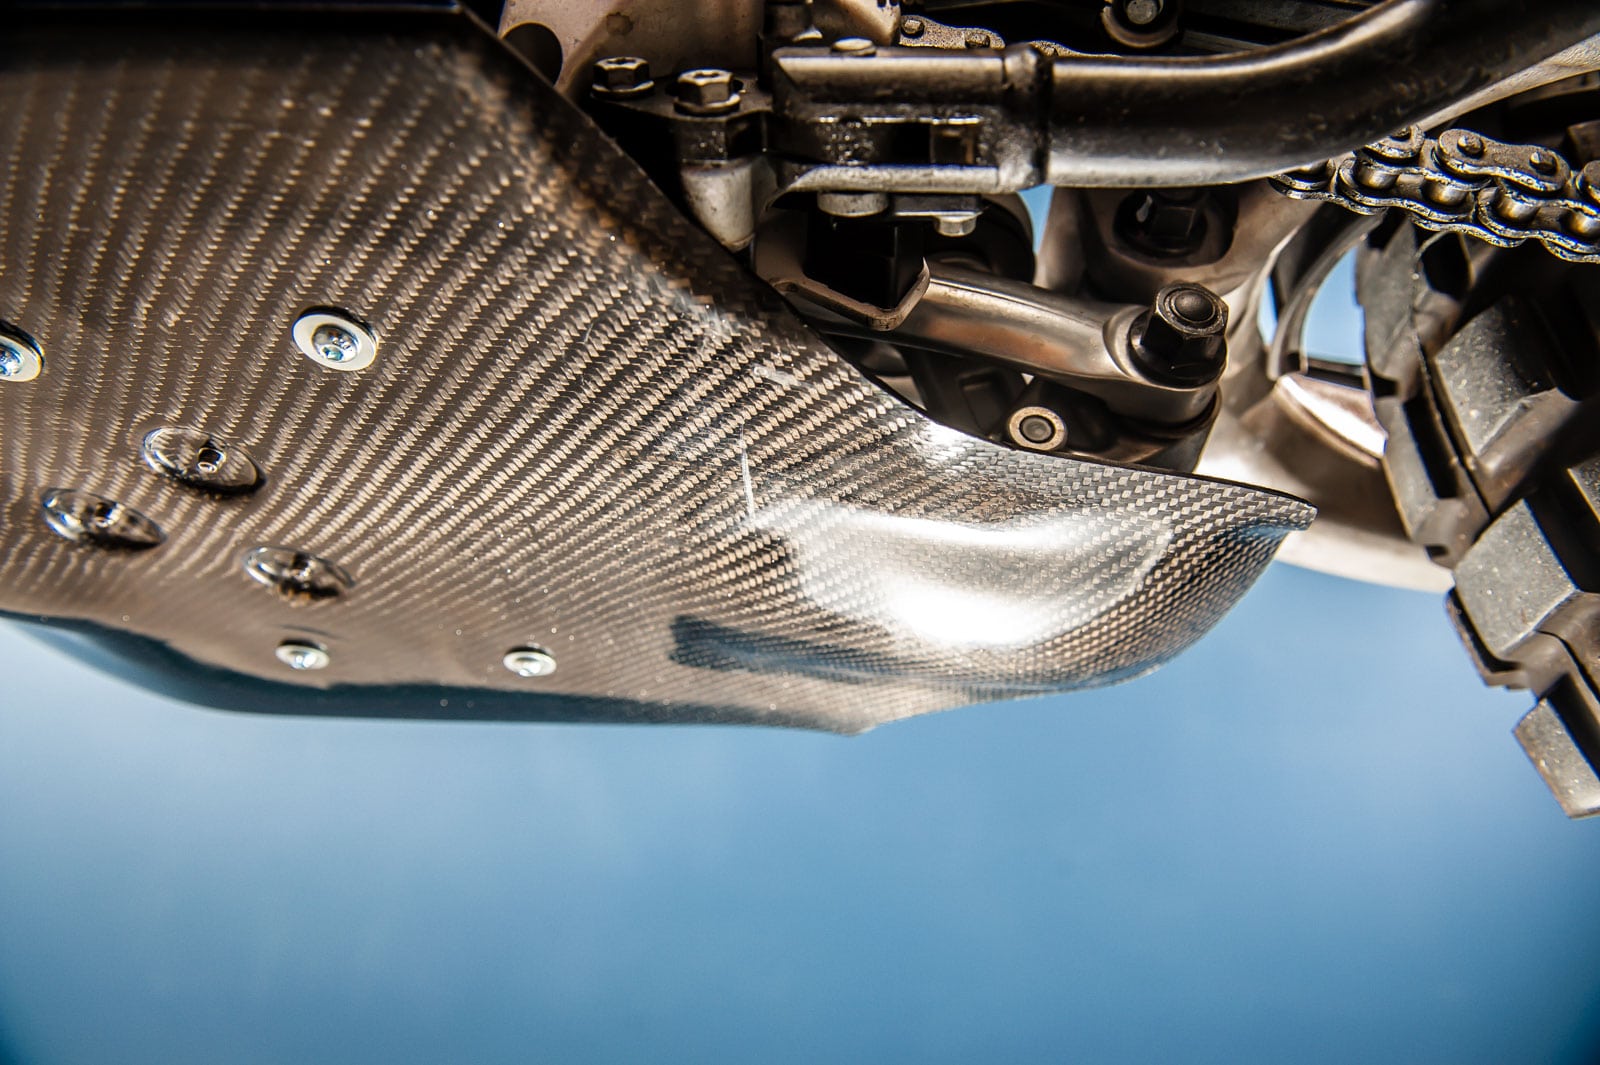
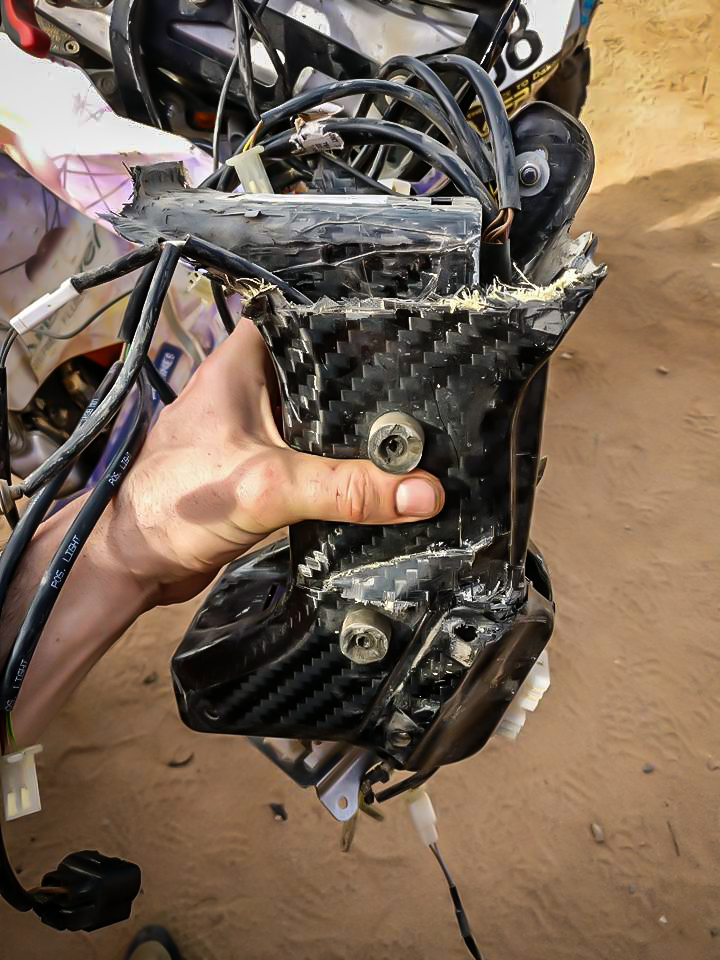
Let’s start with Carbon. It’s light, strong but the quality depends on the production method and the materials used. There are different weaves, different weights, different manufacturing methods, and different resins, all resulting in a different outcome. Add the various factors for each one of those and you get so many unknown factors that only a few high technology centers can produce high quality carbon fiber parts that will serve the bike in the long run. Resins will turn yellow when exposed to UV rays, will start cracking if not properly cured and the strength of the part will be compromised. Cracking is important. And we mean it in the bad way. The cracks will allow moisture and water to go into the material, and if aramid (Kevlar®) is used water will be absorbed. This will result in further delamination, rendering the part useless. Whenever aramid is exposed, it will eventually absorb water. Our skid plates are pure Carbon Fiber for that very reason. Take for example the sector that Carbon Fiber is used in all its glory. The bicycle sector. No, it is not F1. F1 parts need to be light, but once they crash, they are thrown into the bin. A bicycle is a different story. And Carbon Fiber frames have none of that yellow stuff, for a good reason. Kevlar is not as good as a structural material.
The manufacturing method is another story. Fabric cut out by hand, by CNC machines, how it is layout on the mould, what material is the mould made off (Aluminum, Glass Fiber, Carbon Fiber, Resin etc.), the curing process, and after treatment… A lot of things that can go sideways in a process, meaning that the variability of the outcome is increased. Let alone the checks that the manufacturer must do to ensure that the material has the properties that were defined during the design phase.
All in all, Carbon Fiber skid plates are good for racing solutions or solutions that the skid plate is so large that you must save weight. If weight reduction a all cost is the target, this is the material to use. You save weight and you protect the bike, but you must maintain them and not treat them as indestructible piece of equipment. Because they are not!
Continuing to Polymers which seem to gain momentum in the Adventure sector too. They are extremely light, durable, and quite strong, but they are very flexible, and they are affected (depending on the material of course) by high temperatures. They are not suitable as bash plates for heavy bikes, and although they are in the market for the heavy adventure bikes, if you hit a rock with them, it will not end up well. But they are very light and a lot cheaper than Carbon Fiber ones.The reason is that polymers by definition are softer than metals hence they deform a lot. They are excellent sliders, but a polymer will give way upon a hard impact. If it is combined with other materials in key places, then his may be one of the best solutions out there. Lightweight and strong where it needs to be!
Stainless steel skid plates exist too. They are very heavy, but you can go through rocks without an issue. Previously mentioned materials (Carbon to some extent and Polymers of course to full extent) are flexible enough to minimize the force that is transferred to the mounting points. Steel? Not so much… Therefore, the mounting points of such a skid plate must be carefully chosen to ensure that the bike does not sustain any damage if it hits something solid! There are stories on 701 and 690 enduro bikes where the engine cast mount broke due to that very reason!
.jpg)
Finishing with our favorite, the mighty Aluminum! Variable thickness skid plates exist, and the aluminum is one of the most common materials used for a skid plate. There is a good reason for that. Unpainted will corrode in the long term, so it must be either anodized or powder coated (depending on the alloy). The welds must be of good quality and if the skid plate has threads on it for whatever the reason, you must be careful not to strip them. A good design will dissipate the force to the anchoring points in a way that the frame or engine will not sustain any damage. There are multiple techniques, from collapsible brackets to rubber attenuators. Look for soft mounting points and proper energy dissipation techniques.
The importance of a motorcycle seat cannot be overstated; it's the cornerstone of rider comfort. A poorly designed seat can transform your ride into a torturous ordeal. It's not just about height and shape; the choice of materials is equally vital.
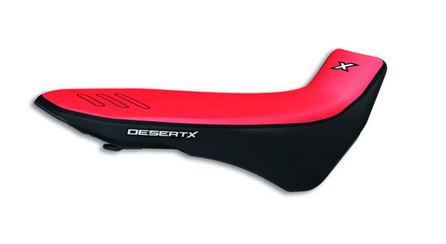
Foam Quality: Opt for top-notch foam that's the right thickness and hardness. Quality foam ensures you can stay on the bike for extended periods without discomfort. Molded foams, in particular, are excellent because they offer precise control over foam density. However, they can be pricier due to the initial cost of creating the mold. When it comes to seat covers, trust brands with a proven track record in the field. Experience counts.
Gel Materials: Gel materials have made their mark in motorcycle seats. There's a common misconception that gel needs time to warm up and become comfortable, but this isn't accurate. Gel materials come in various viscosities, but their core function is consistent: distributing pressure from your buttocks across a broader area. They start doing this from the moment you sit down, regardless of temperature. When assessing gel materials, seek out fully approved options. Feel them, test them, and gauge how well they distribute pressure. Gel materials should be installed on a firm foam to work best, so you may need to change the foam completely.
Understanding Softness: When evaluating the softness of a material, it's essential to consider the pressure equation: Pressure = Force / Area. Pressing a finger into a material concentrates the force on a small area, making it seem softer. To obtain a more accurate sense of softness, use your full palm to press down, distributing the force over a larger area.
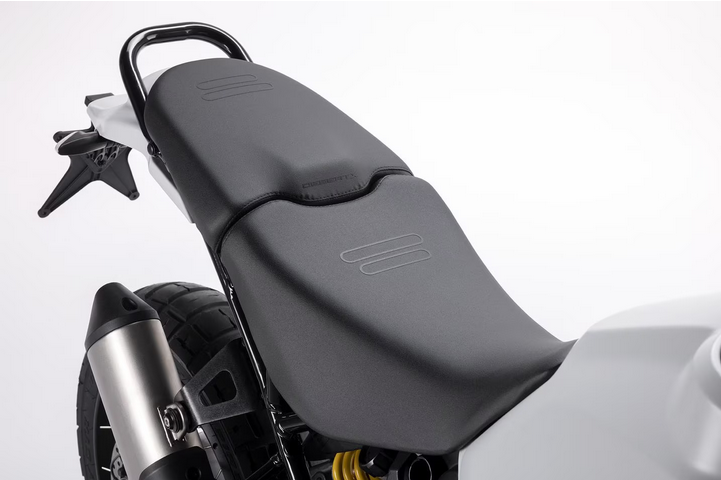
Seat Geometry: Seat width plays a pivotal role in comfort. In rally bikes, comfort seats often have a wider rear section. This design allows riders to relax during long liaison sections. When it's time to go full throttle, the front area narrows to facilitate better movement and control on the bike, especially during aggressive riding.
In conclusion, the motorcycle seat is more than just a place to sit; it's the cornerstone of your riding experience. Thoughtful consideration of foam quality, gel materials, and seat geometry ensures that your journeys are as comfortable as they are enjoyable.
Fuel tanks are the key to unlocking the the forest trails and embarking on thrilling adventures.
Back when the Dakar was in its prime, motorcycles used to explore the African deserts with hefty fuel loads of 50-60 liters. However, in today's racing world, fuel loads have dwindled significantly. Our trusty 701/690 Xplorer bikes now carry a more modest 28 liters of fuel, which still enables them to cover an impressive 600 kilometers non-stop under optimal conditions.
Material options include various types of Polyethylene, Glass, Carbon fiber, Nylon, and Aluminum. While each material possesses distinct characteristics, Polyethylene reigns supreme. Nylon comes in a close second, with Aluminum following, and composites bringing up the rear. But why this particular ranking?
Polyethylene emerges as the front-runner due to its exceptional qualities. This material offers remarkable flexibility, making it ideal for field repairs using PE rods. It can be drilled or modified as needed and is exceptionally lightweight. With proper maintenance, PE tanks have the potential to last the entire lifespan of the bike, and their puncture-resistant nature is evidenced by their dominance in Dakar races over the years.
Nylon takes the second spot, being more challenging to produce but boasting increased rigidity, particularly evident in rear tanks for bikes like the 701/690. Additionally, it prevents fume leakage, rendering it perfect for fully compliant bikes.
On the other hand, Aluminum (or steel) tanks are more labor-intensive to manufacture, typically produced in small batches or as one-offs. However, their Achilles' heel lies in the fatigue limit of aluminum, which makes them prone to cracking and deformation upon impact, a weakness not shared by Nylon or PE tanks.
.jpg)
Composites occupy a distinct position, showcasing their prowess in top-tier motorsport with materials like aramid reinforced with rubber, even meeting the rigorous standards of the FIA (FT5 fuel tanks standard). However, for the everyday enthusiast, Glass or Carbon Fiber tanks are more common choices. Despite their appeal, these materials suffer from a critical drawback: they can crack and subsequently leak. What compounds the issue is that the crack's initiation point often differs from the actual leak site, making proper repairs exceedingly challenging. While Glass and Carbon Fiber tanks are suitable for short to medium-term use, achieving long-term durability demands stringent manufacturing standards, specific resin properties, and a fully repeatable production process. With the addition of specialized fuel tank protectors, Carbon Fiber tanks ascend to be the first choice. These protectors provide an extra layer of defense, bolstering the durability and resilience of Carbon Fiber tanks. This innovative solution ensures that even the most challenging adventurers can rely on Carbon Fiber tanks for their fuel storage needs, making them an ideal choice for those seeking both performance, longevity and low weight in their motorcycle journeys.
This is a classic debate. Low or high? Read on!
When it comes to rally bike setups, one critical choice that riders often face is whether to opt for a low or high front fender configuration. Each option has its own distinct advantages and disadvantages, catering to different riding styles and terrain conditions.
Low Front Fender:
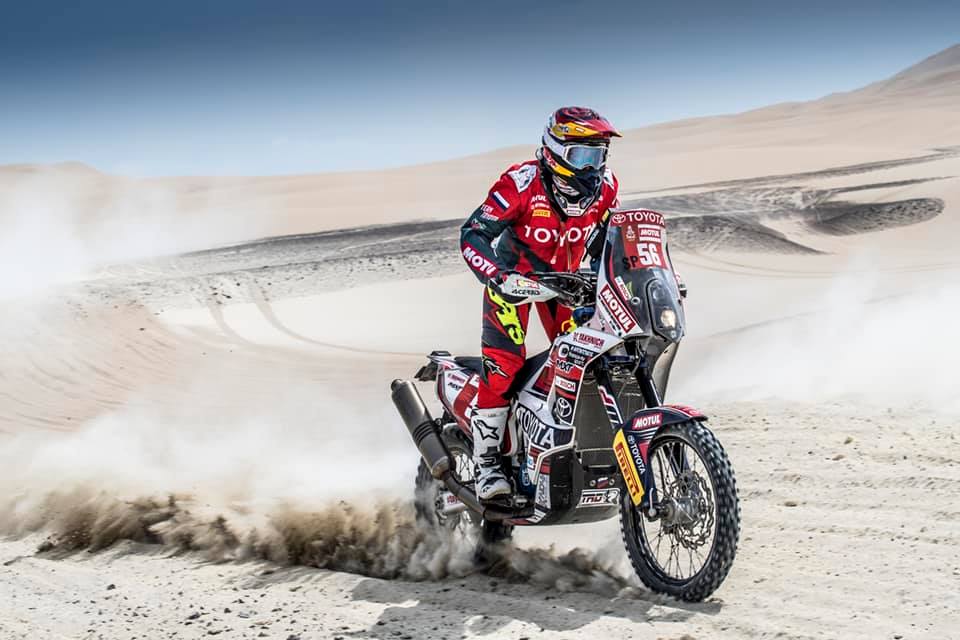
Photo: Anastasiya Nifontova, KTM 450 Rally.
Advantages:
Aerodynamics: A low front fender minimizes air resistance, making it an excellent choice for high-speed sections of a rally. It reduces the drag on the front wheel, allowing the bike to reach higher speeds more efficiently.
Visibility: The lower profile of the fender offers better visibility of the front wheel and the terrain immediately in front of the bike. This can be especially beneficial for navigating technical and rocky terrain.
Weight Distribution: By placing the weight lower on the front wheel, a low front fender can improve the bike's stability and handling, enhancing overall control.
Disadvantages:
Mud and Water: One of the primary drawbacks of a low front fender is its vulnerability to mud and water splashes. In wet and muddy conditions, the fender can accumulate debris, reducing visibility and potentially affecting the operation of the front wheel.
Limited Clearance: Low fenders may have limited clearance for larger off-road tires or when tackling deep ruts and obstacles. This can lead to clogs and jams. Sometimes even breaking the fender!
High Front Fender:
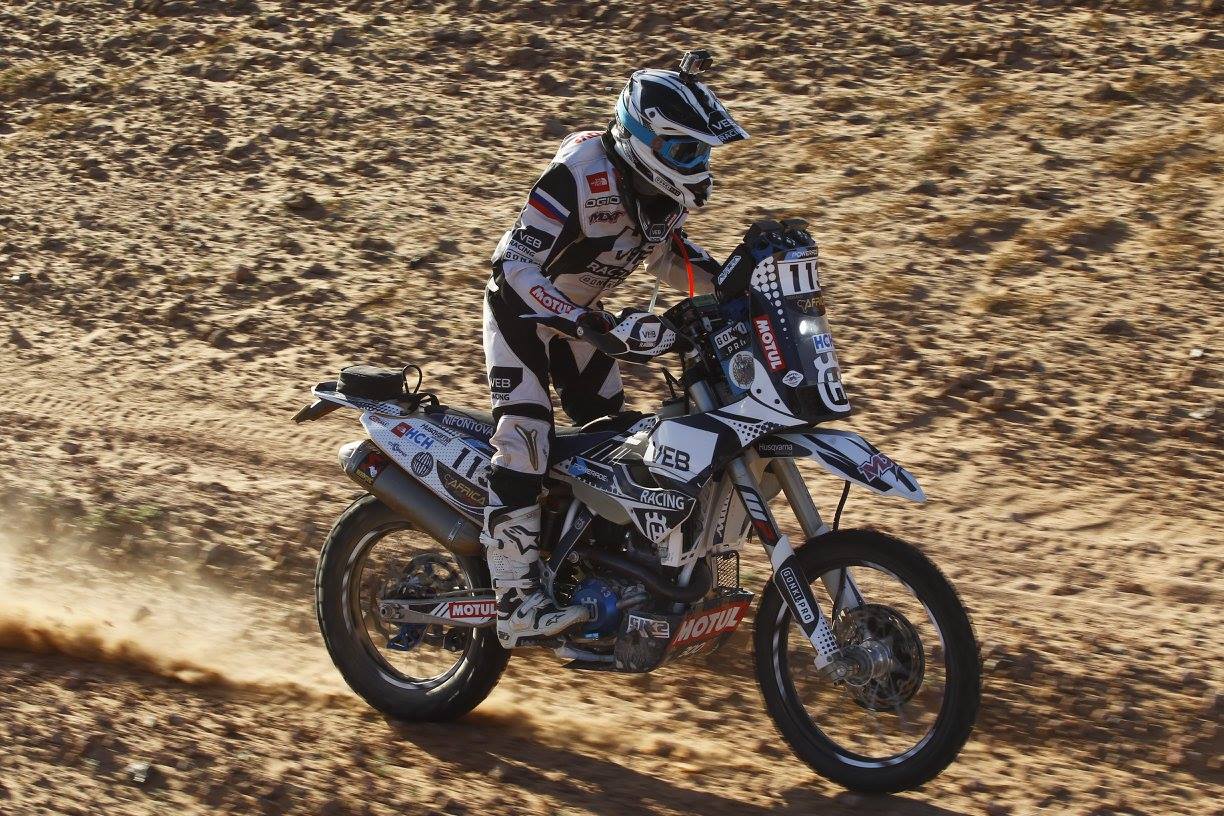
Photo: Anastasiya Nifontova, Husqvarna 450
Advantages:
Mud and Water Clearance: A high front fender excels in muddy and wet conditions. It offers ample clearance for the front wheel, preventing mud and water from clogging and reducing the risk of overheating.
Deeper Terrain: When navigating deep ruts, sand dunes, or rough terrain, a high front fender provides better clearance, reducing the chances of the wheel getting stuck. (imagine in the sand where the front wheel sometimes goes knee high deep).
Protection: It offers increased protection to the front suspension components and fork seals, preventing damage from rocks and debris thrown up by the front tire. This is because the side fork covers can have a much better geometry and be fully optimized to protect the forks.
Disadvantages:
Aerodynamics: High front fenders can increase air resistance, which may impact the bike's top speed and fuel efficiency during high-speed sections of a rally. They can also change the stability in high speeds.
Visibility: The higher position of the fender can limit the rider's view of the front wheel and immediate terrain. This can be a disadvantage when precise wheel placement is crucial.
In conclusion, the choice between a low and high front fender largely depends on the rider's preferences and the specific rally conditions they expect to encounter. For those aiming for top speeds on open sections, a low fender is an aerodynamic advantage. Conversely, riders tackling muddy or technical terrain may benefit from the mud clearance and protection offered by a high front fender. Some rally bikes even feature adjustable fender setups, allowing riders to adapt to changing conditions during a race. Ultimately, the ideal choice is a balance between aerodynamics, terrain, and personal riding style.
When outfitting a rally bike for racing or adventure, one of the key decisions riders must make pertains to the type of rally lights to install. There are three primary options to consider: legal lights, LED off-road lights, and cutting-edge laser lights. Each choice has its own set of advantages and disadvantages, making it important to select the one that aligns with your specific needs and conditions.
Legal Lights:
Advantages:
Compliance: Legal lights adhere to road and off-road regulations, ensuring that you remain street-legal, making them an excellent choice for dual-purpose bikes.
Versatility: These lights are designed to provide adequate illumination for both on-road and off-road riding, making them a versatile choice for riders who frequently transition between different terrains.
Durability: Legal lights are typically built to withstand the rigors of everyday use and are less prone to damage from off-road impacts or vibrations.
Disadvantages:
- Limited Performance: While legal lights can serve well for basic visibility, they may not offer the same level of brightness and reach as dedicated off-road lights, limiting their effectiveness in challenging off-road conditions.
LED Off-Road Lights:
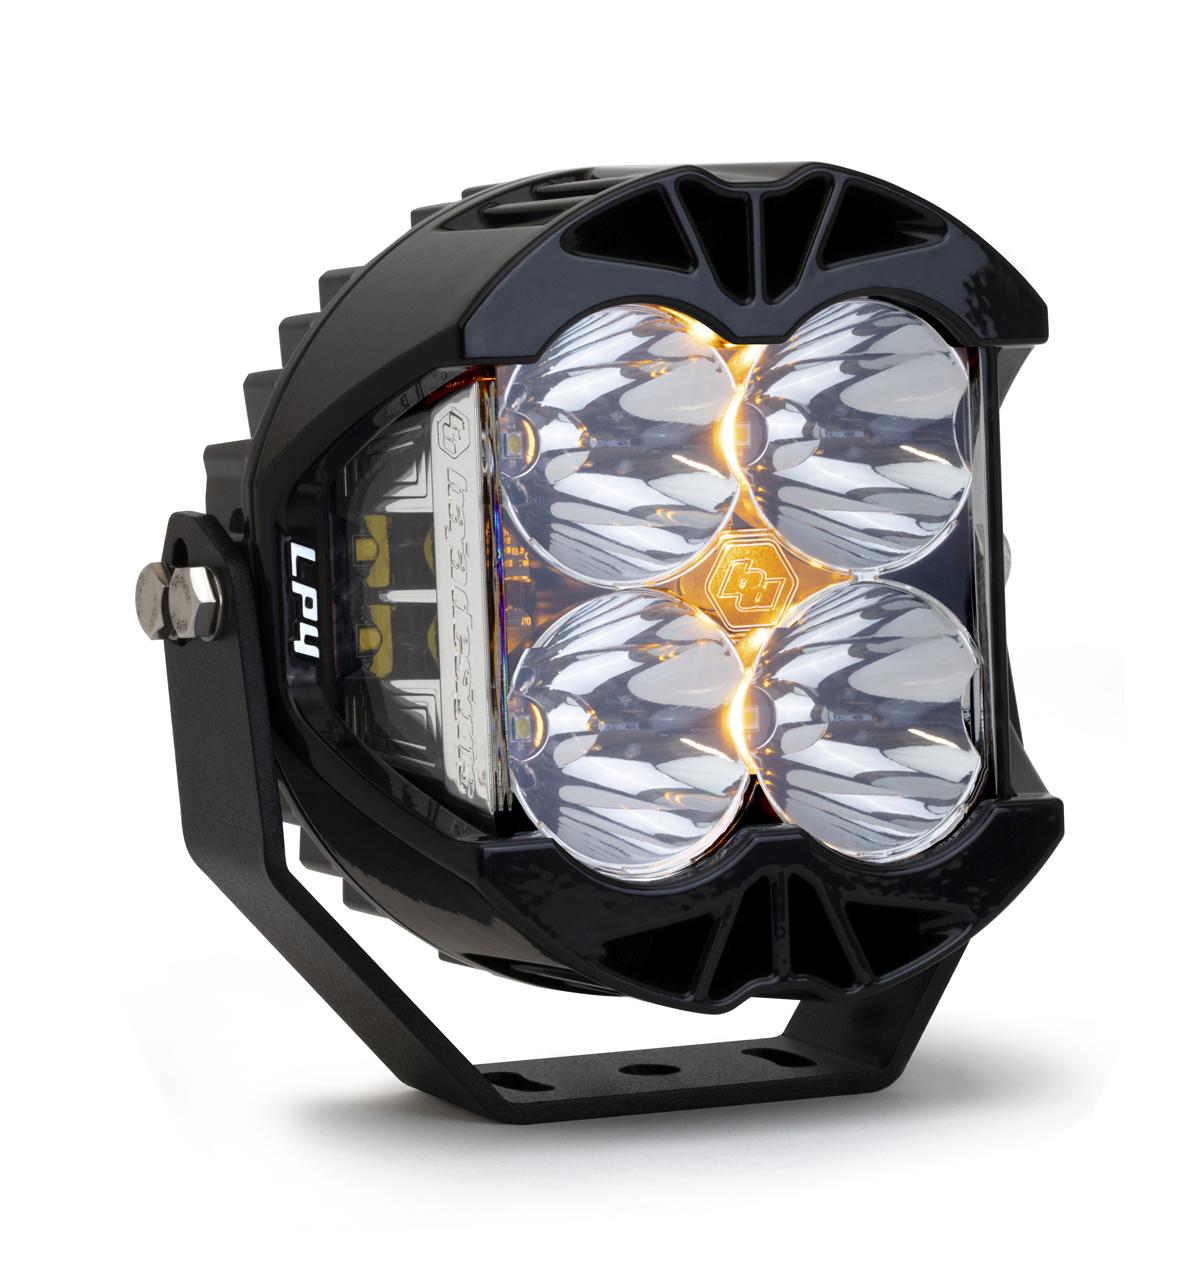
Advantages:
Brightness: LED off-road lights are renowned for their exceptional brightness and the ability to illuminate the trail ahead, even in pitch-black darkness.
Energy Efficiency: LEDs are energy-efficient, drawing less power from the bike's electrical system while providing powerful lighting, allowing for extended use without draining the battery excessively. 2xLP4 units in our Ducati DeserX rally kit will result in 17500 lumens output! To give you a base to compare, a good quality HB3 has close to 2600-3000 Lumens.
Durability: These lights are often built to withstand off-road abuse, featuring rugged construction and resistance to dust, water, and shock.
Disadvantages:
- Non-Compliance: LED off-road lights may not comply with road-legal regulations in some regions, potentially limiting their use to off-road environments only.
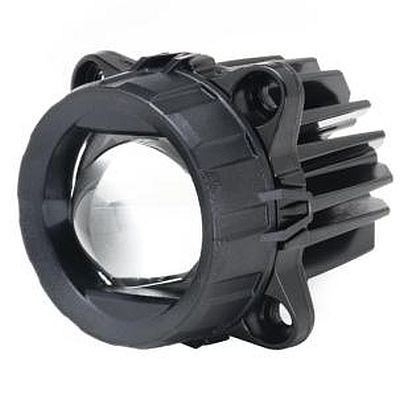
Laser Lights:
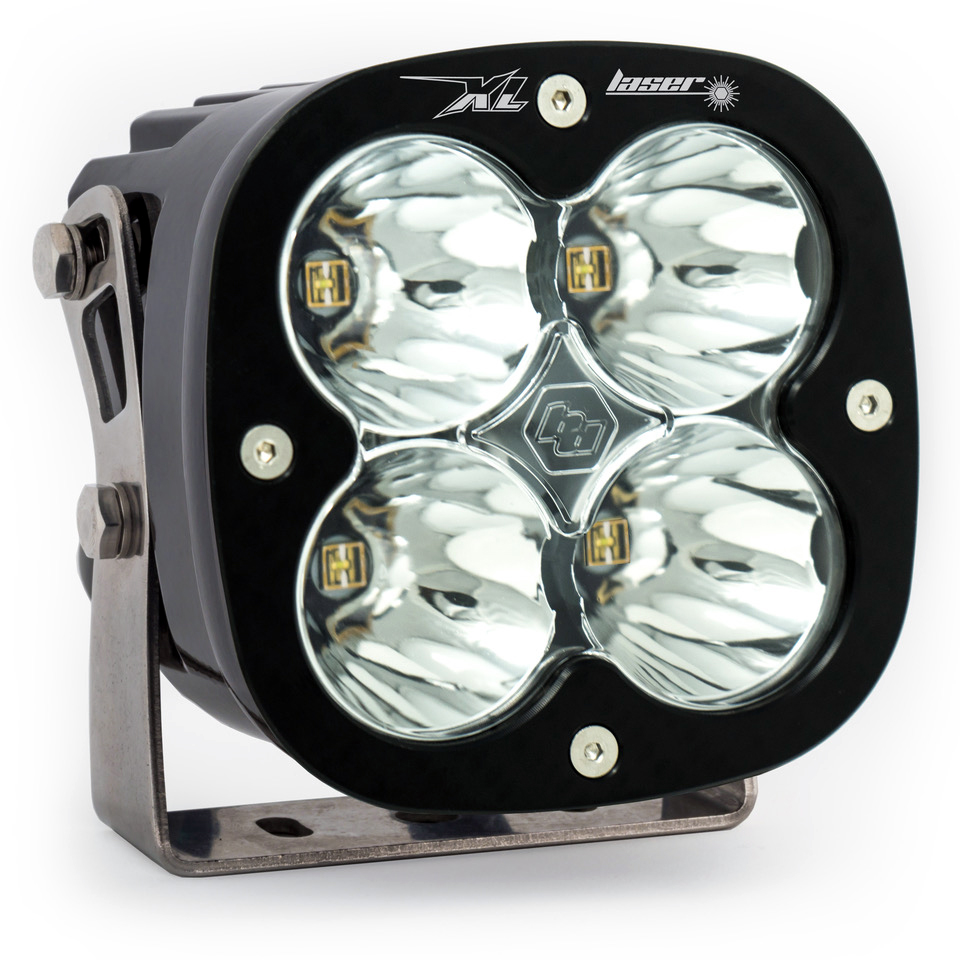
Advantages:
Unmatched Brightness: Laser lights represent the pinnacle of lighting technology, offering unparalleled brightness and an extended range, which can be invaluable in extreme off-road situations.
Compact Design: Laser lights are compact and lightweight, making them an attractive option for rally bikes where weight and space are at a premium.
Energy Efficiency: Similar to LEDs, laser lights are energy-efficient, ensuring that they don't overly tax the bike's electrical system.
Disadvantages:
Regulations and Cost: Laser lights may face regulatory restrictions in some areas, and their cutting-edge technology often comes with a higher price tag compared to other lighting options.
Maintenance: The precision optics of laser lights may require careful maintenance and alignment to ensure optimal performance.
In conclusion, the choice of rally lights for your bike should be based on your intended use, local regulations, and personal preferences. Legal lights are a practical choice for riders who need dual-purpose functionality. LED off-road lights offer exceptional brightness and durability, making them ideal for dedicated off-road enthusiasts. Laser lights provide unrivaled brightness and compactness, but their use may be subject to regulations and cost considerations. The right choice ultimately depends on your specific riding needs and conditions.
The marketing catch...
Both lumens and lux are relevant metrics for understanding the output and performance of LED lights, but they provide different types of information:
Lumens: Lumens (lm) measure the total amount of visible light emitted by a light source in all directions. It quantifies the overall brightness of the light source itself. Lumens are a good indicator of a light's potential output and can help you compare the brightness of different light fixtures.
Lux: Lux (lx) measures the illuminance or the amount of light that falls on a specific surface area. It takes into account the distance between the light source and the surface being illuminated. Lux is a measure of how well a light source illuminates a particular area and is a more practical metric for assessing how effective a light will be for a specific task or application. This is a better way to understand 'how far we will see' on the road.
Think what happens when you focus a maglight to a dot. The flashlight lamp is the same, but now the light appears brighter to your eyes because is is focused in one area. If you remove the cap, the flashlight becomes like a candle, illuminating the room, but less bright in your eyes. In both cases the lumens are exactly the same.
In summary:
- Lumens tell you how much light is produced by the source.
- Lux tells you how much of that light actually reaches a particular area. (to give you an idea, in a meeting room or some workstations you may need more than 750 lux).
When choosing LED lights, it's essential to consider both lumens and lux. Lumens help you gauge the overall brightness potential, while lux helps you understand how effectively that brightness is distributed across a given area. For example, a high-lumen LED light may have a strong output, but if it's not properly focused or directed, it may not provide sufficient illuminance (lux) where you need it.
For various applications, you'll want to look at both metrics. For example, when selecting lighting for a workspace or reading area, you'll want to consider the lux to ensure that you have adequate illumination on the task at hand. In contrast, for outdoor floodlights or general area lighting, you might prioritize lumens to ensure a bright overall environment.
There are three types of air filters. Foam, gauze and paper.
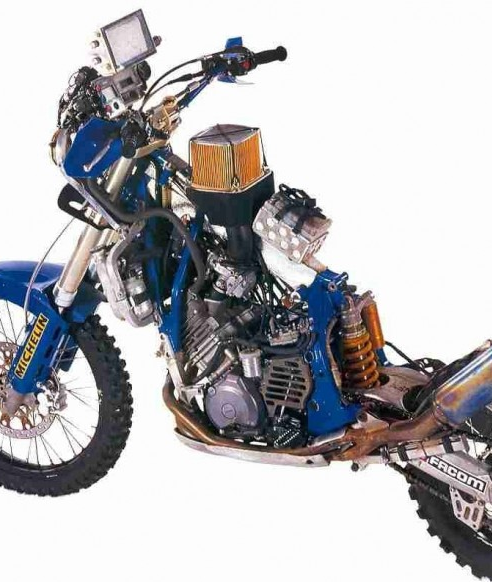
The filter above is a Yamaha YZE750T Dakar bike.
OEM filters are, more often than not, paper filters. Paper has excellent filtration, but it does not like mud and water and has to be fully replaced after its service life. It comes without saying that to get the best air filtration you have the highest pressure drop due to being so restrictive. Foam filters on the other hand is the choice of OEM for off road bikes. They are used in small cc bikes (enduro and rally bikes up to 500cc for example), but when the engine vacuum is high (i.e. larger capacity engines), this medium may need to be specially designed in order to provide good filtration. Gauze filters allow for highest airflow, they are rugged by construction, you can reuse them and they are the gold standard in WRC cars for example.
But which one is for you? There is a common misconception. That good filters do not let any particles go through. This is a wrong statement by definition. If air passes through, some particles go through as well. The question is: 'How big has to be a particle that goes through to damage my engine?' This has not been answered yet as there are no scientific data. A factory Dakar engine and a WRC engine have different lifetime criteria. They do not have to last for half a million miles. They have to finish the championship, sometimes just a race and then they may be have to be fully rebuilt.
In our bikes we want the best filtration possible. You can monitor how clean is the airbox after a ride and decide if the type of filter suits you. In industrial machines that operate in the desert 24/7 (air compressors for example for various heavy equipment) there is always a pre-filter to catch the big particles, small insects and other debris and then a second stage that will filter the less polluted air. We are following the same technique in our DesertX with two gauze filters.
Remember that nothing can replace proper maintenance and timely filter replacements!
By brackets we mean metallic accessories that serve as supports for the various added equipment on the bike. Tank brackets for example will support the extra tanks that are installed on the bike. Fairing brackets are brackets that will support the extra ABS fairings. Skid plate brackets support the skid plate and so on and so forth.
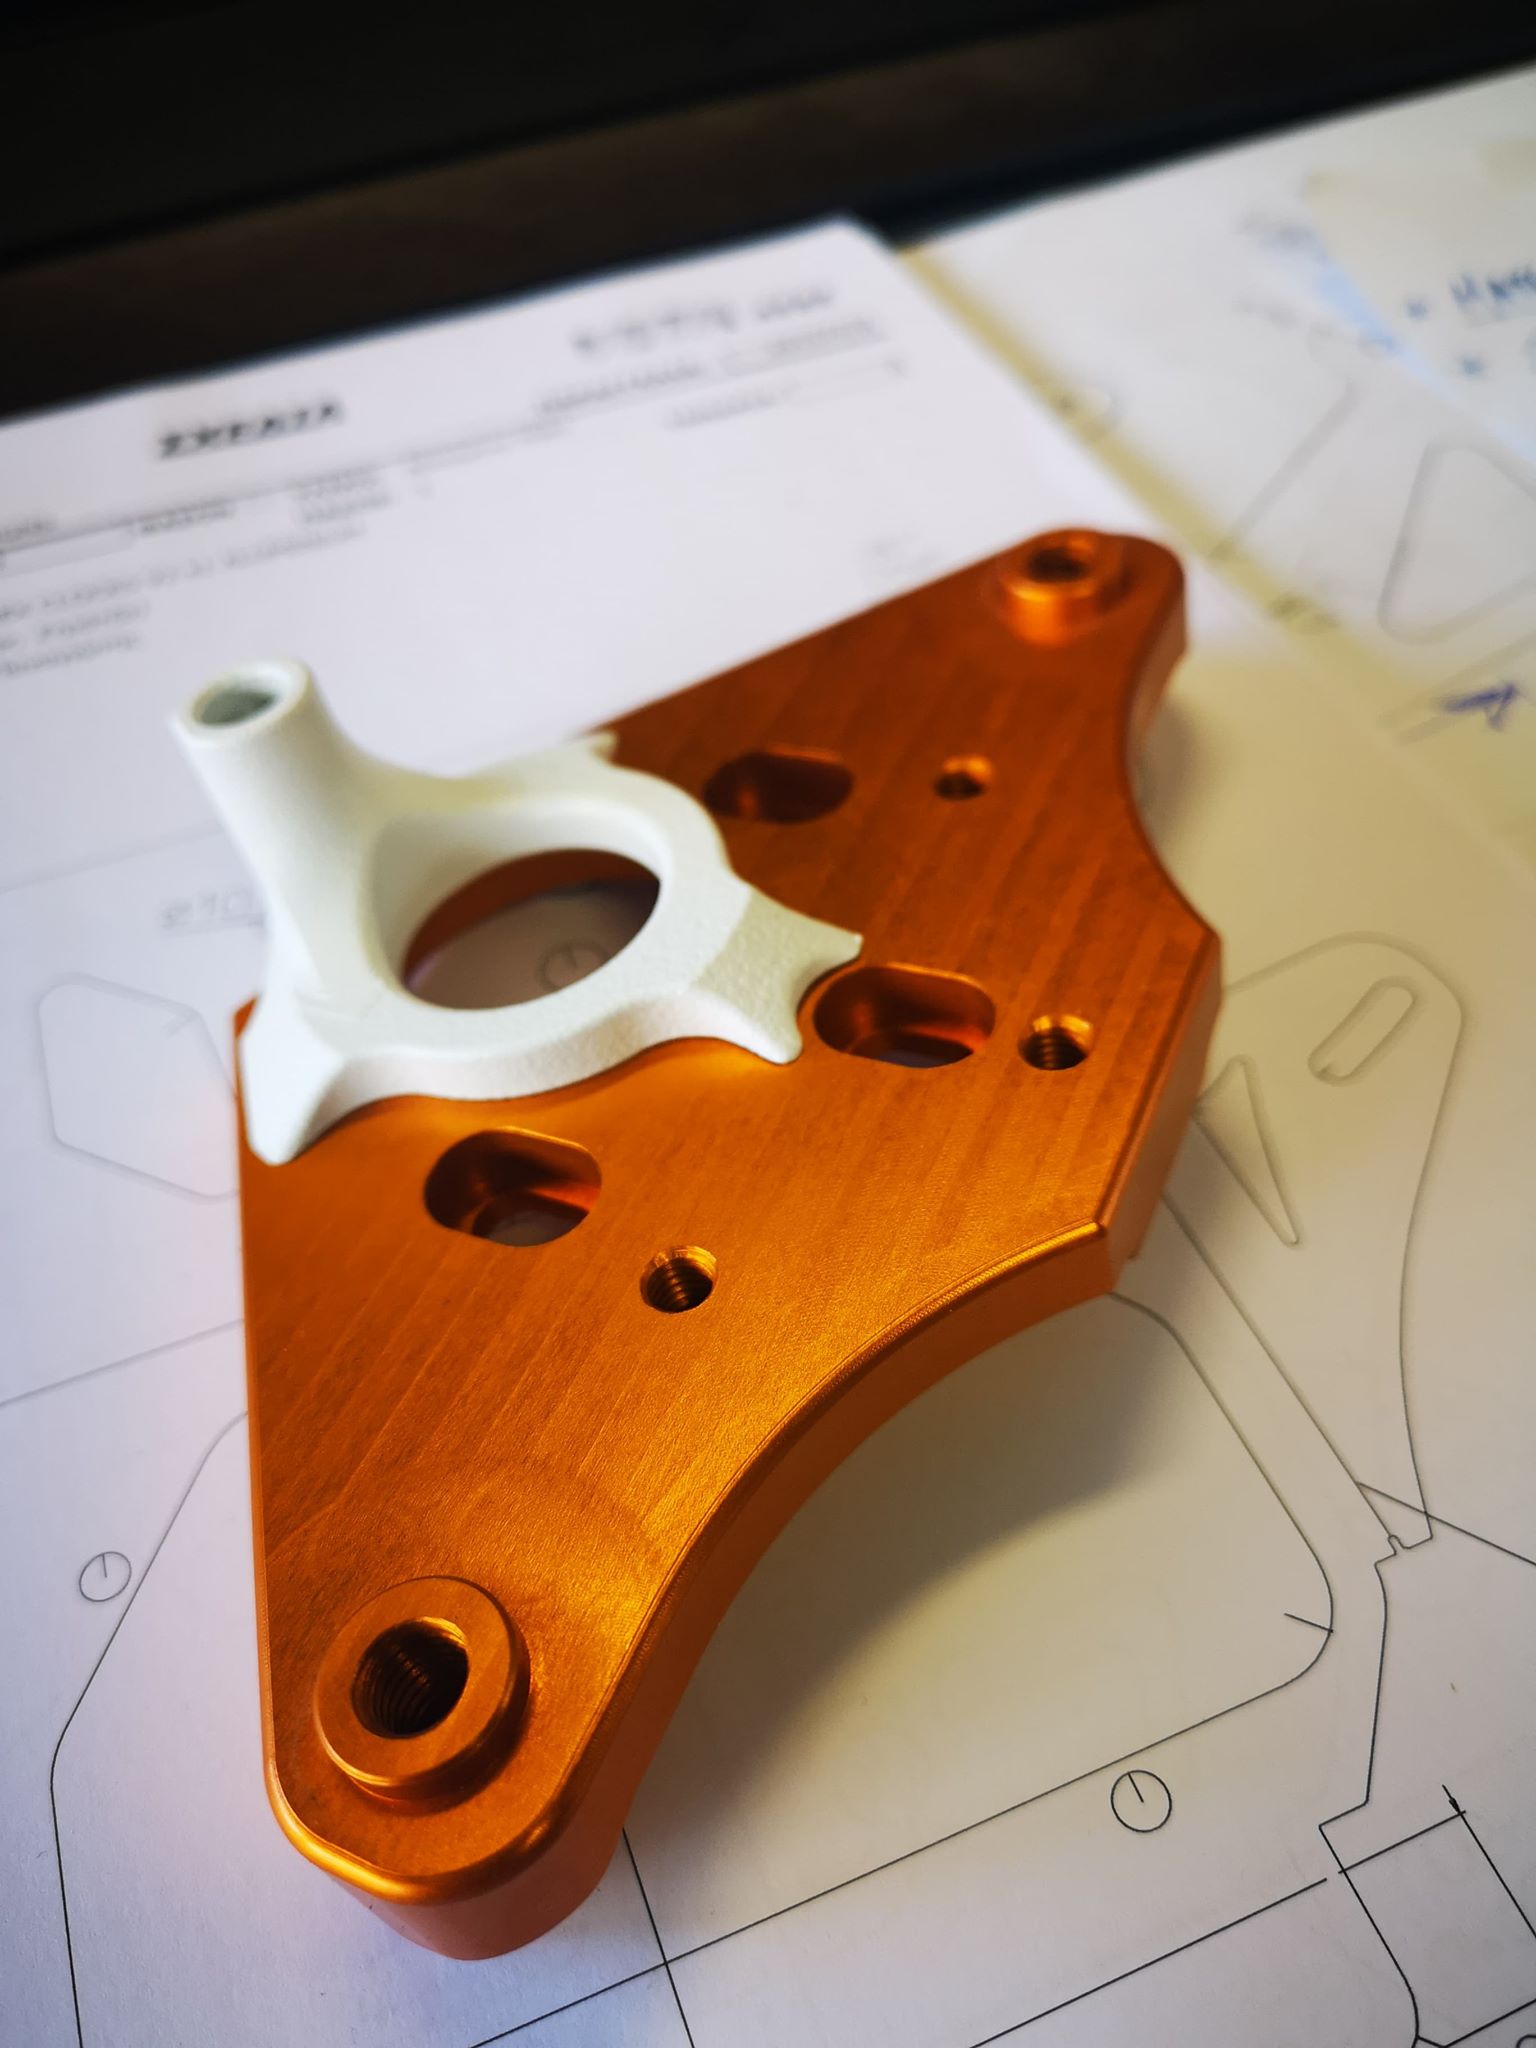
All the brackets must have certain characteristics. For example, a bracket may be better to bend to protect the radiator, than be stiff and break the radiator in the event of a crash. It is a part that will be compromised to protect the rest of the structure. Depending on the design for each assembly of course. The tank brackets that are time consuming to install and remove from the bike, should remain intact during a crash. Easy to reach brackets can be sacrificed though so that the rest of the structure is protected.
Aluminum is lightweight, therefore it provides weight reduction when they are CNC machined, while stainless steel brackets can be used in places that we need to sacrifice parts during a heavy crash. The strategic placement of the parts and the careful choice of materials ensures that the bike can withstand the test of time while protecting essential parts from damage, resulting in you being safer during your time on the bike.
Fueling is a critical area on the bike. For once, it can leave you stranded in the middle of nowhere, and then it can result in fueling spillage, risking setting the bike on fire. Usually, nowadays the fuel pump is inside the fuel tank. The system comprises of the fuel pump motor, a fuel filter, a pressure regulator, and a level sensor. The fuel pump motor is the heart of the pump. It pushes fuel to the injector. The fuel filter is like our kidneys. It will filter out all the small and large particles that can harm and kill the motor, or clog the injector. The pressure regulator is a valve that opens when the pressure in the system increases beyond a set limit. This is what you hear when you first turn on the bike. The noise from the tank, is the fuel pump priming. It will fill the hoses with fuel, but as the injector is closed it will just increase the pressure in the system and then recirculate the fuel in the tank till it stops. Then it is shut off if the bike does not start. The fuel level sensor, usually a thermistor which, when exposed to the air (i.e., no fuel in the tank) it will start to overheat, changing the resistance in the circuit, which in turn will get an incandescence bulb of a certain wattage to glow. A potentiomener is used (when you sea a plastic floating device in the tank) in some other cases (when a true fuel level is needed) and then you can monitor the % fuel level on the tank in a much more controlled way.

Rally kits that come with extra tanks, is important to come with their own fuel pump. This is not only for redundancy reasons, but also allows you to control the weight distribution of the bike and save your rear tire at will. In racing during the long liaisons, the riders empty the rear tanks first to save on the rear tire, while in the technical sections the front ones are emptied first to let that front suspension do the work. If you have only one fuel pump, with extra tanks, this puts an extra load on the pump. This pump will now never rest and run double the time (if you are up for the distance!). Especially in difficult situations, having a second pump can save the day, because in the worst-case scenario you can move the fuel from the front tanks to the rear and vice versa, allowing you to run the complete distance, just by using one of the pumps, till you reach a service point.